DxO PureRAW 6 provides DxO’s renown noise reduction and lens optimization settings for a more superior RAW file to start your edits from.
This blog post is part of the DxO series of blog posts, using DxO PureRAW, DxO PhotoLab, and Nik Collection. Read my separate reviews posts for each of these applications:
[ DxO Workflow | DxO PureRAW | DxO PhotoLab | Nik Collection ]
Disclaimer
The DxO Labs applications were provided for review purposes, but all opinions are my own.
You can use my name TAKU at checkout for 15% off any of their products from their website.


What is Demosaicing?
Demosaicing is the process where the RAW information of your file is analyzed and interpreted into a viewable image. Thus, depending on the algorithm used for this process, the quality (detail, sharpness, noise) of a RAW file will look different. This is why the same RAW file may look slightly different when you open them in different software programs like Adobe Photoshop, Capture One, or PhotoLab.
A typical camera sensor (with Bayer filter) records only one colour per pixel: red, green, or blue. Each pixel therefore only records 1/3 of the available data. This Bayer filter arranges pixels in a 2 pixel by 2 pixel grid (a mosaic): one red, one blue, and two greens. The software used to open your RAW file interpolates the missing 2/3 information of each pixel by analyzing neighbouring pixels.
The demosaicing process therefore interpolates each pixel’s missing information by analyzing its neighbouring pixels to form a full three-channel (RGB) pixel.
Why DxO PureRAW?
DxO PureRAW is a RAW pre-processor, which means you use the program on your RAW files before any colour and creative edits are made. By cleaning your RAW file at the beginning of your workflow, your edits will be made from a superior starting point which carries the quality down your editing workflow.
Use DxO PureRAW if you already have a RAW editor for colour and creative effects.
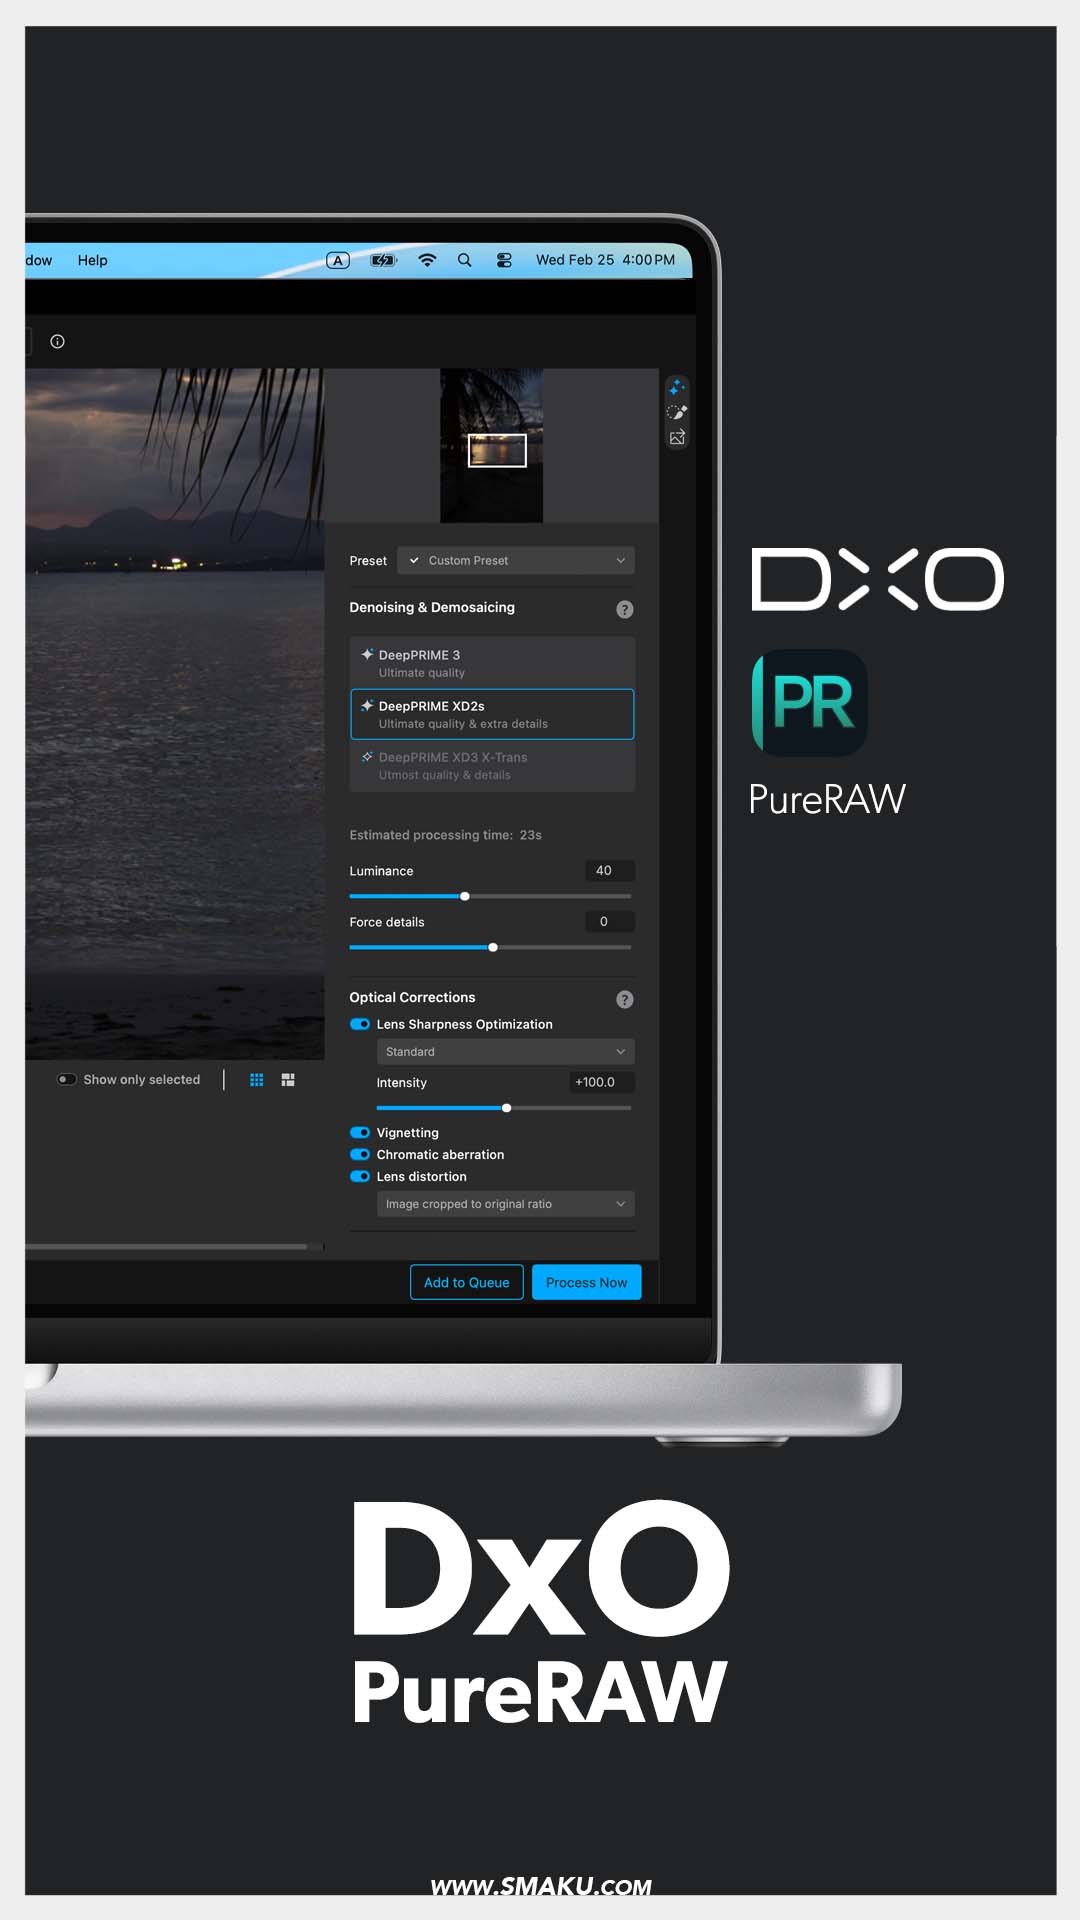
DxO PureRAW 6
Primary changes from PureRAW 5
- Next generation of DeepPRIME (3) now available on cameras with a Bayer filter
- DNG lossless compression allows for up to 4x smaller file sizes
- Faster batch processing for a more efficient workflow
Workflow
For a typical workflow using Adobe Lightroom and DxO PureRAW, you can head to this blog post where I outline everything about DxO PureRAW.
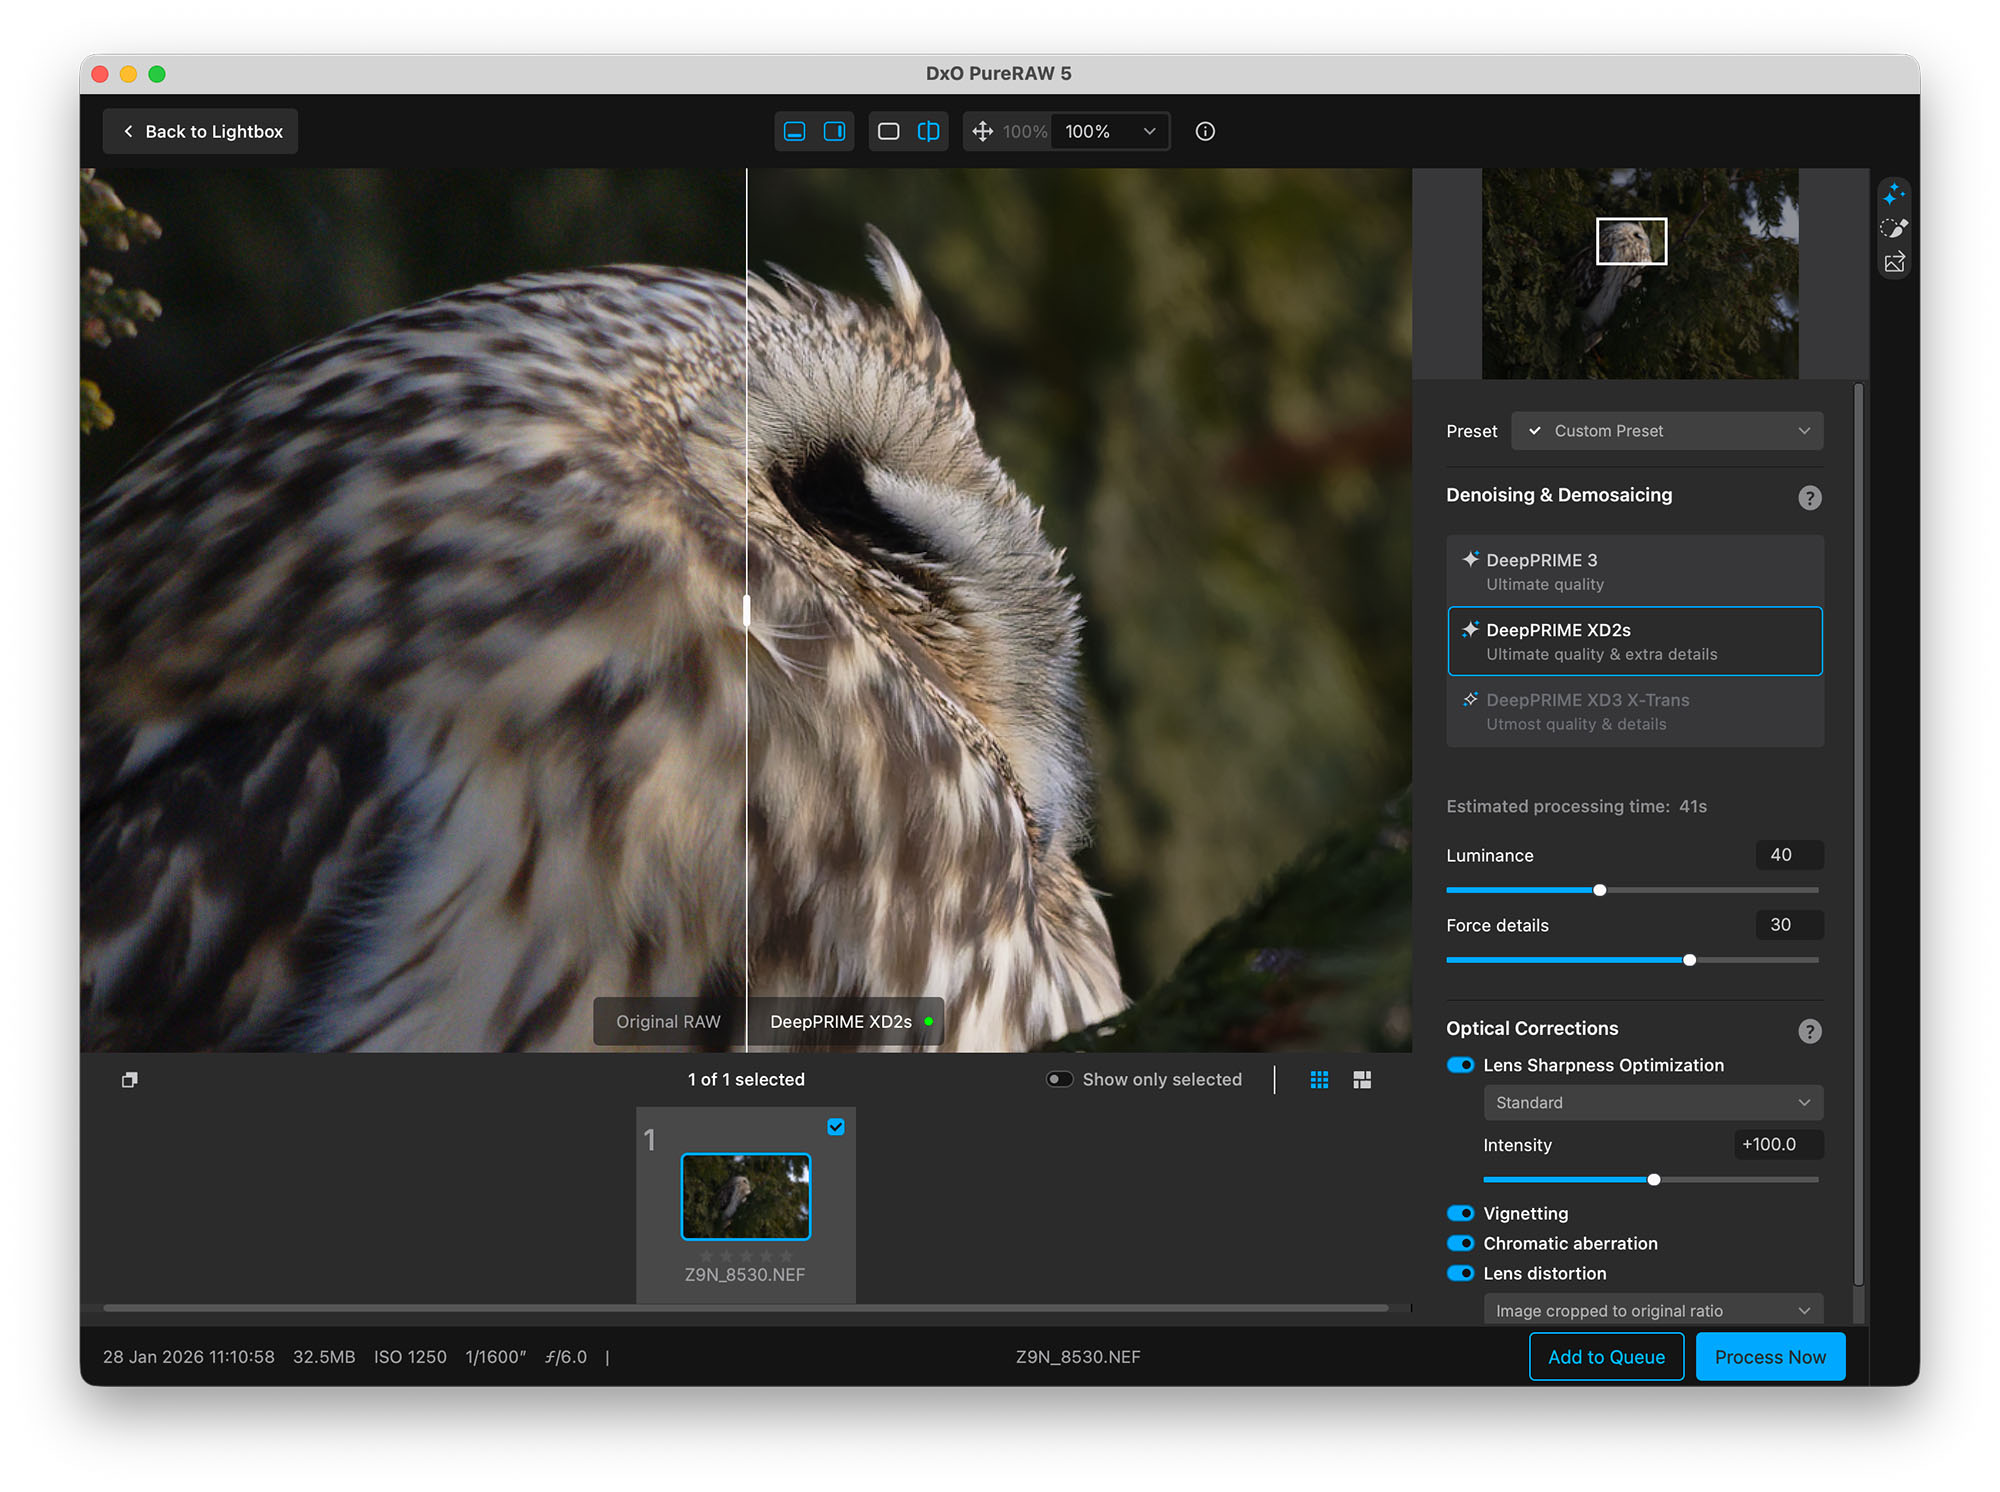
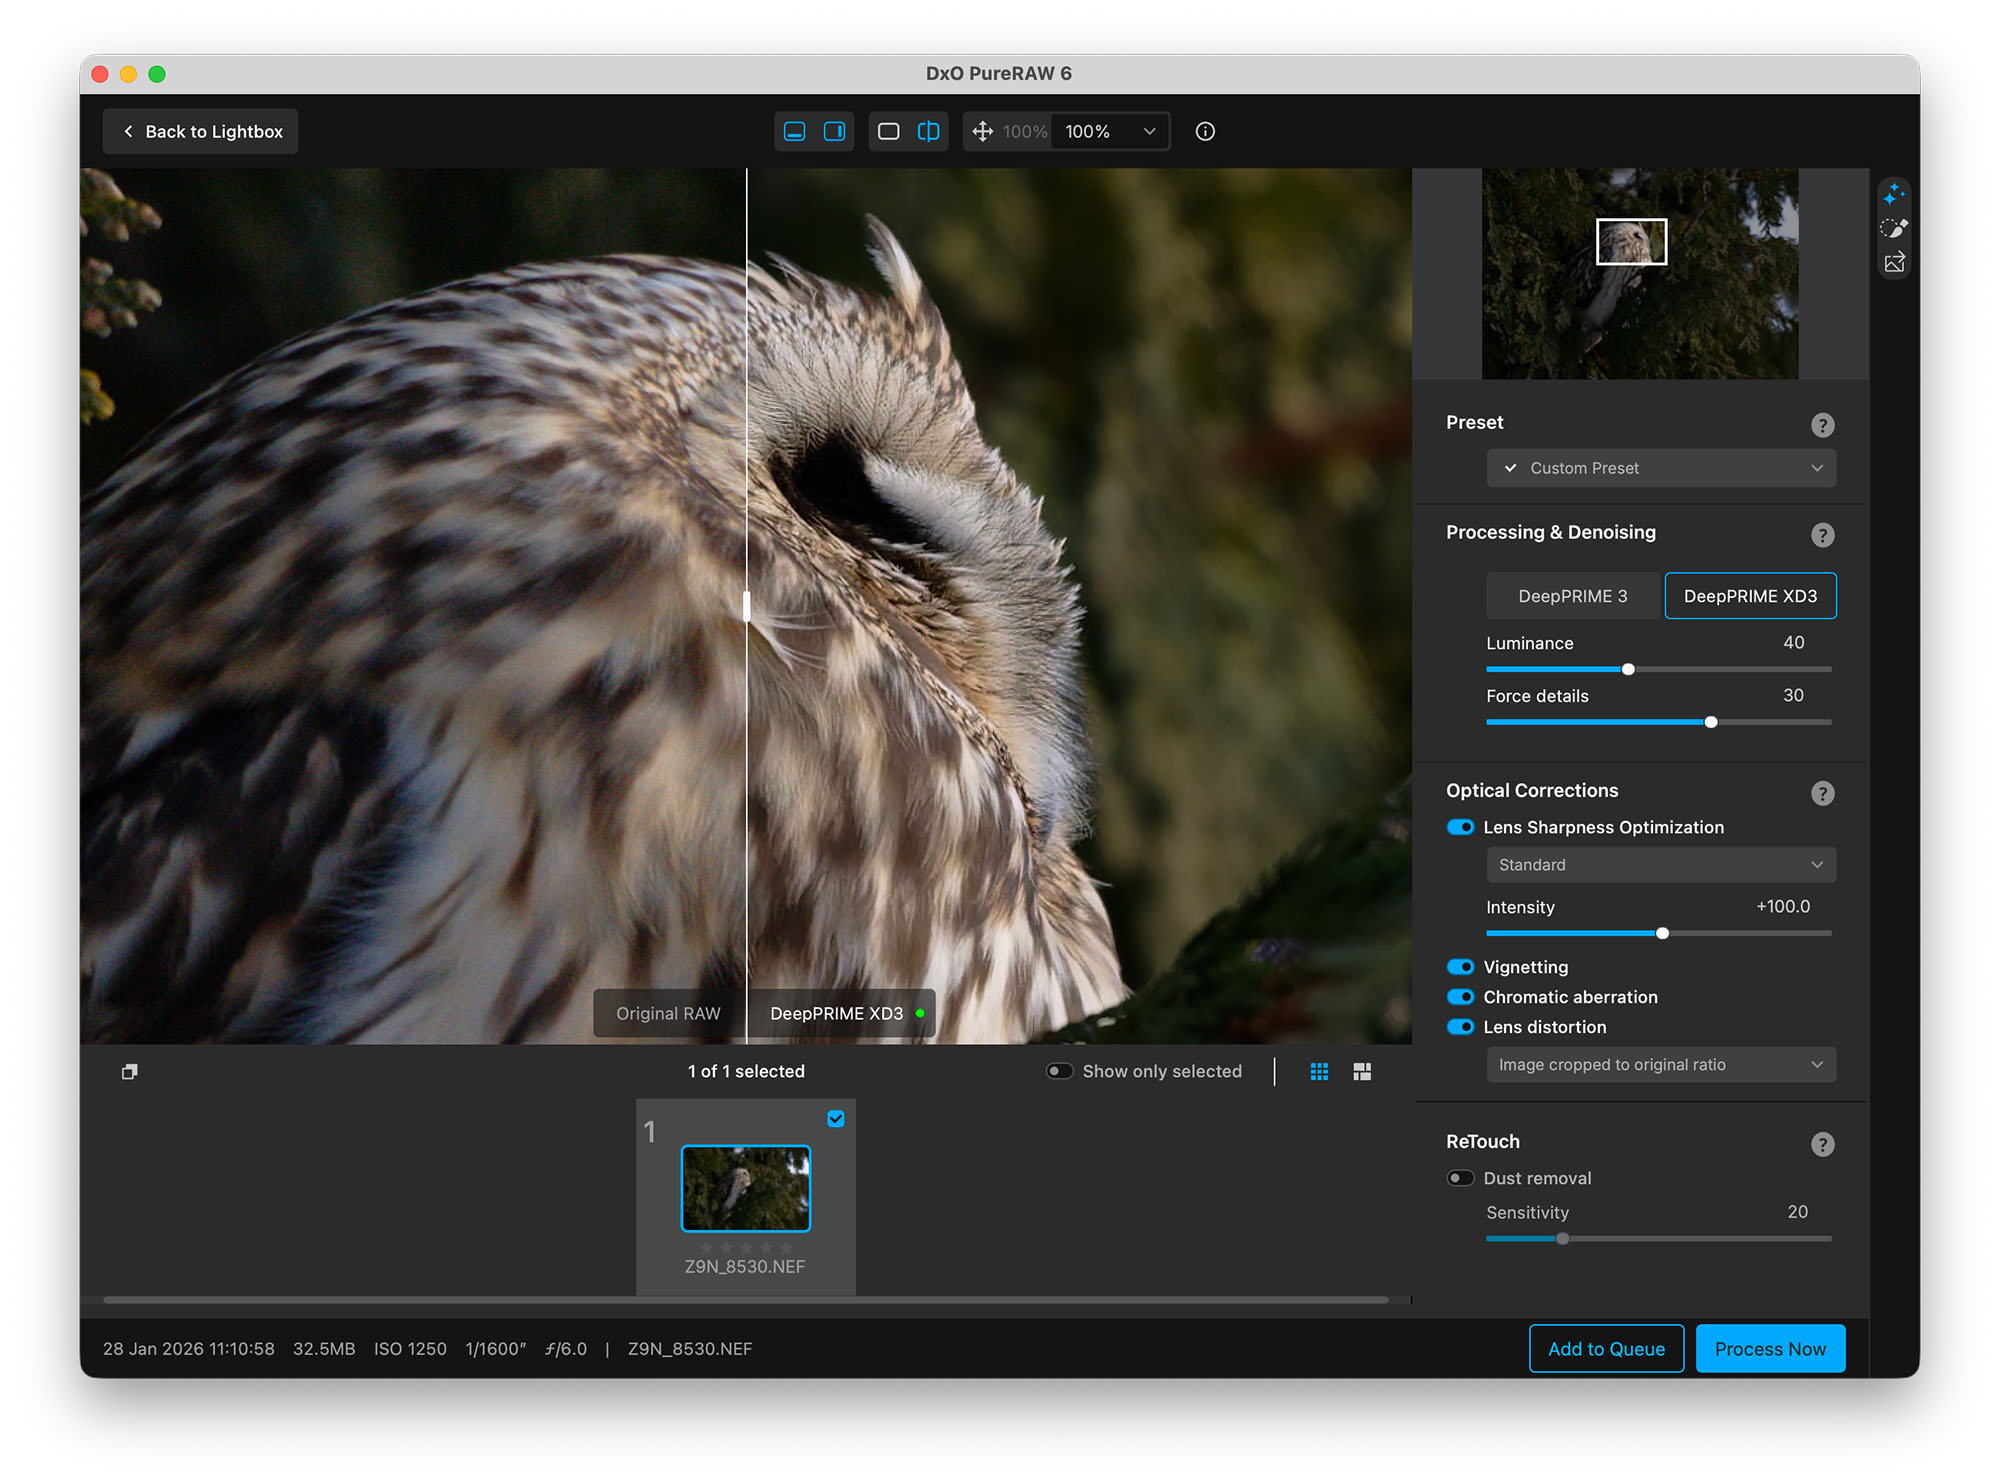
DxO PureRAW 5 vs. DxO PureRAW 6
My original thoughts on DxO PureRAW 5 was that it did a terrific job in creating natural looking RAW files that are sharpened and noise-reduced without creating artificial blotchy areas, like other noise reduction softwares create.
Comparing PureRAW 5 with PureRAW 6, I can see similar results are retained, with PureRAW 6 creating a slightly punchier output. This image was shot with at ISO 1250. Click the image below to enlarge.
How do the individual files compare? Let’s compare the JPG images of each of the above. Each DNG file has been imported into Adobe Photoshop without any settings, and exported at Image Quality 5, and resized to 1800 width by 1200 height. Click to enlarge.

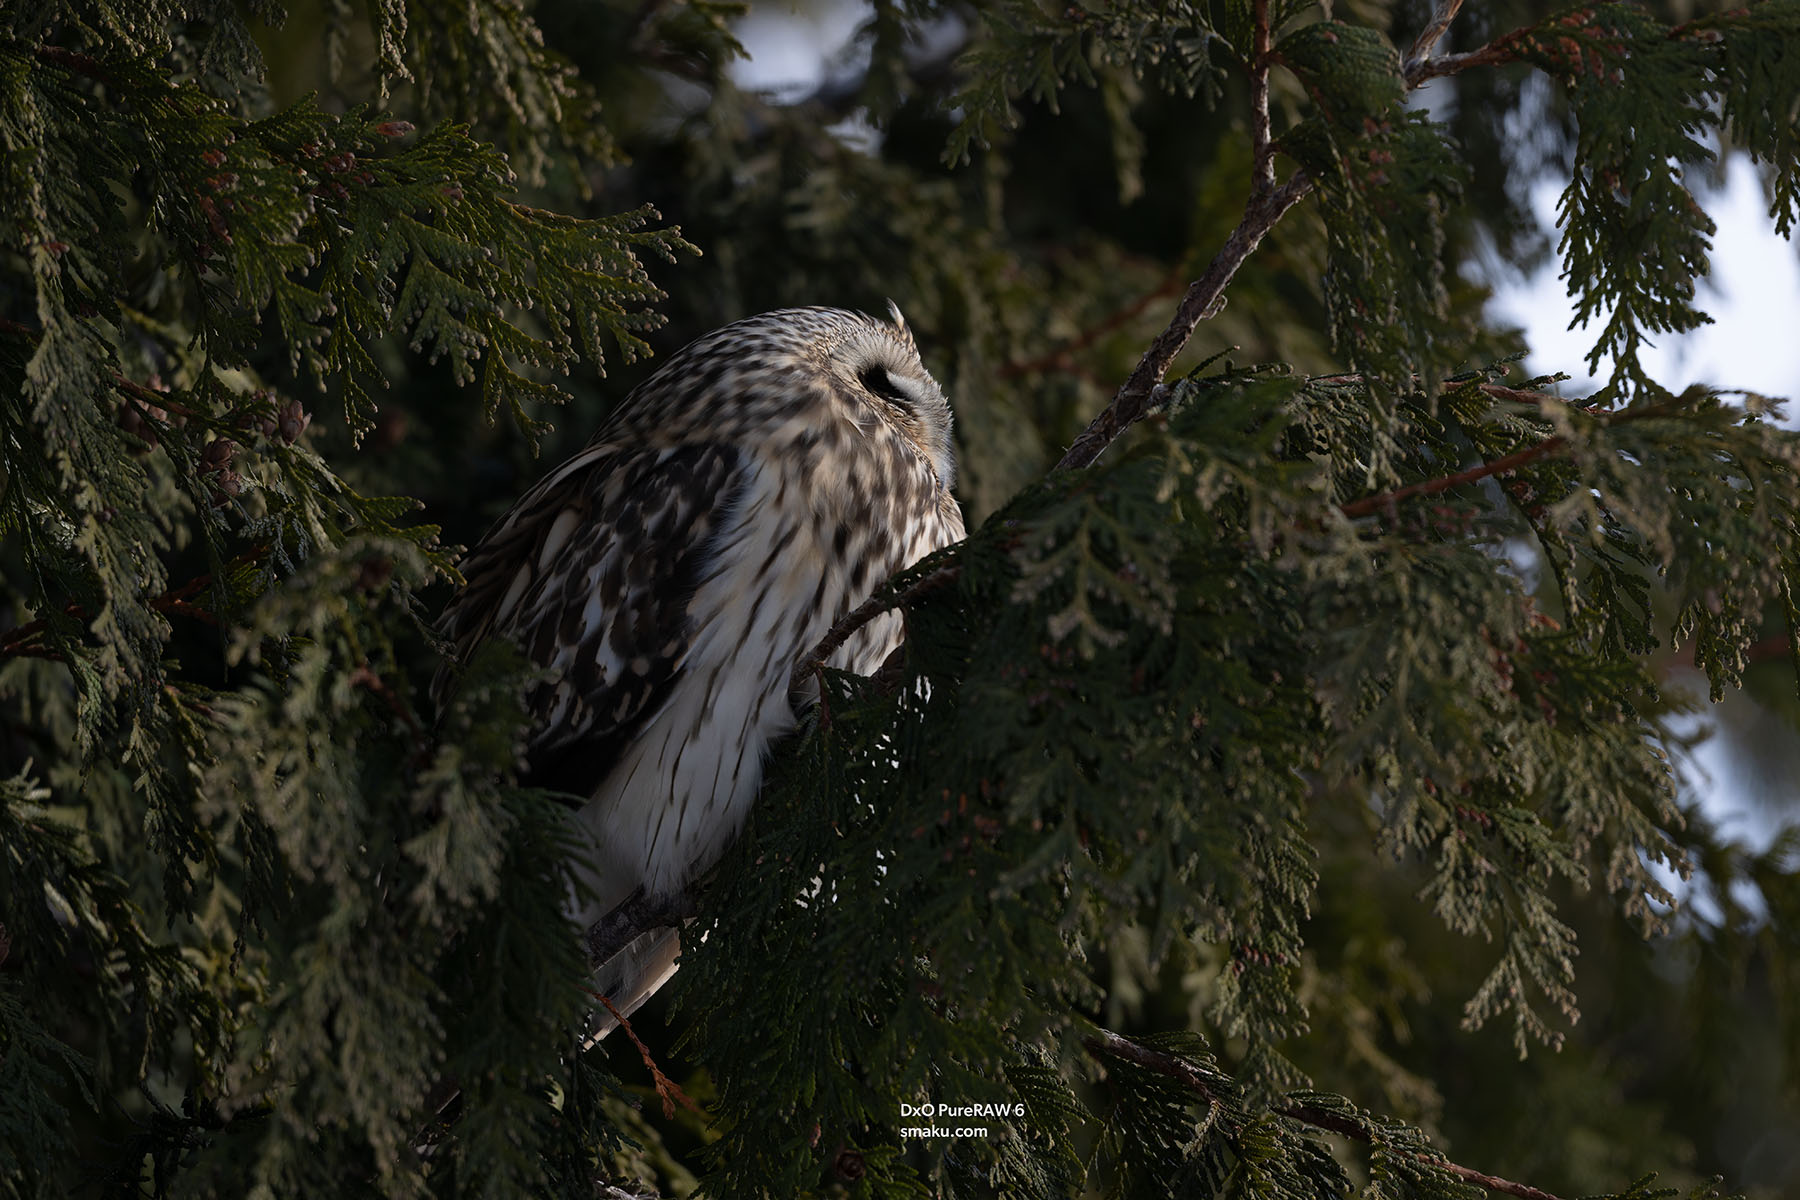


Let’s view the above at 100% to compare the finer details. Each RAW file was imported into Photoshop, and exported out as Quality 5. Click to enlarge.
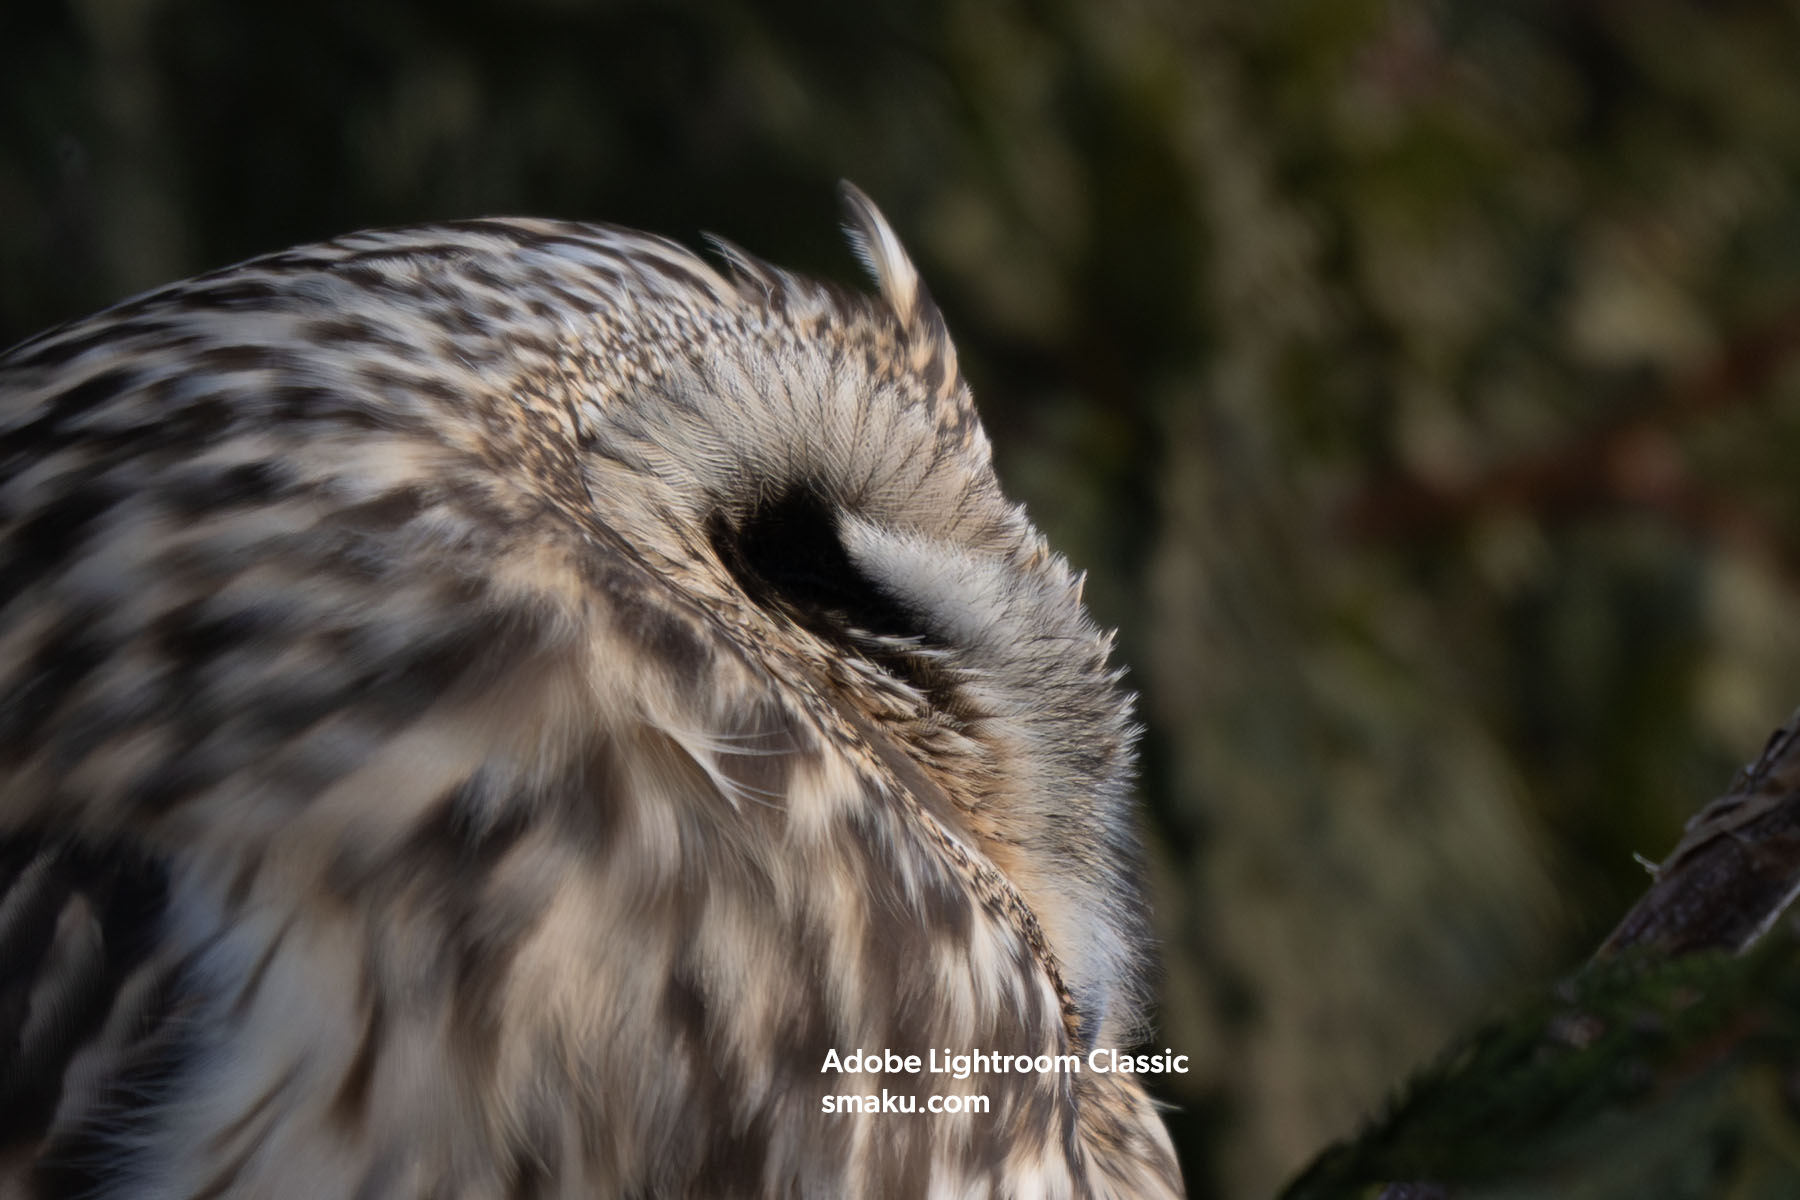

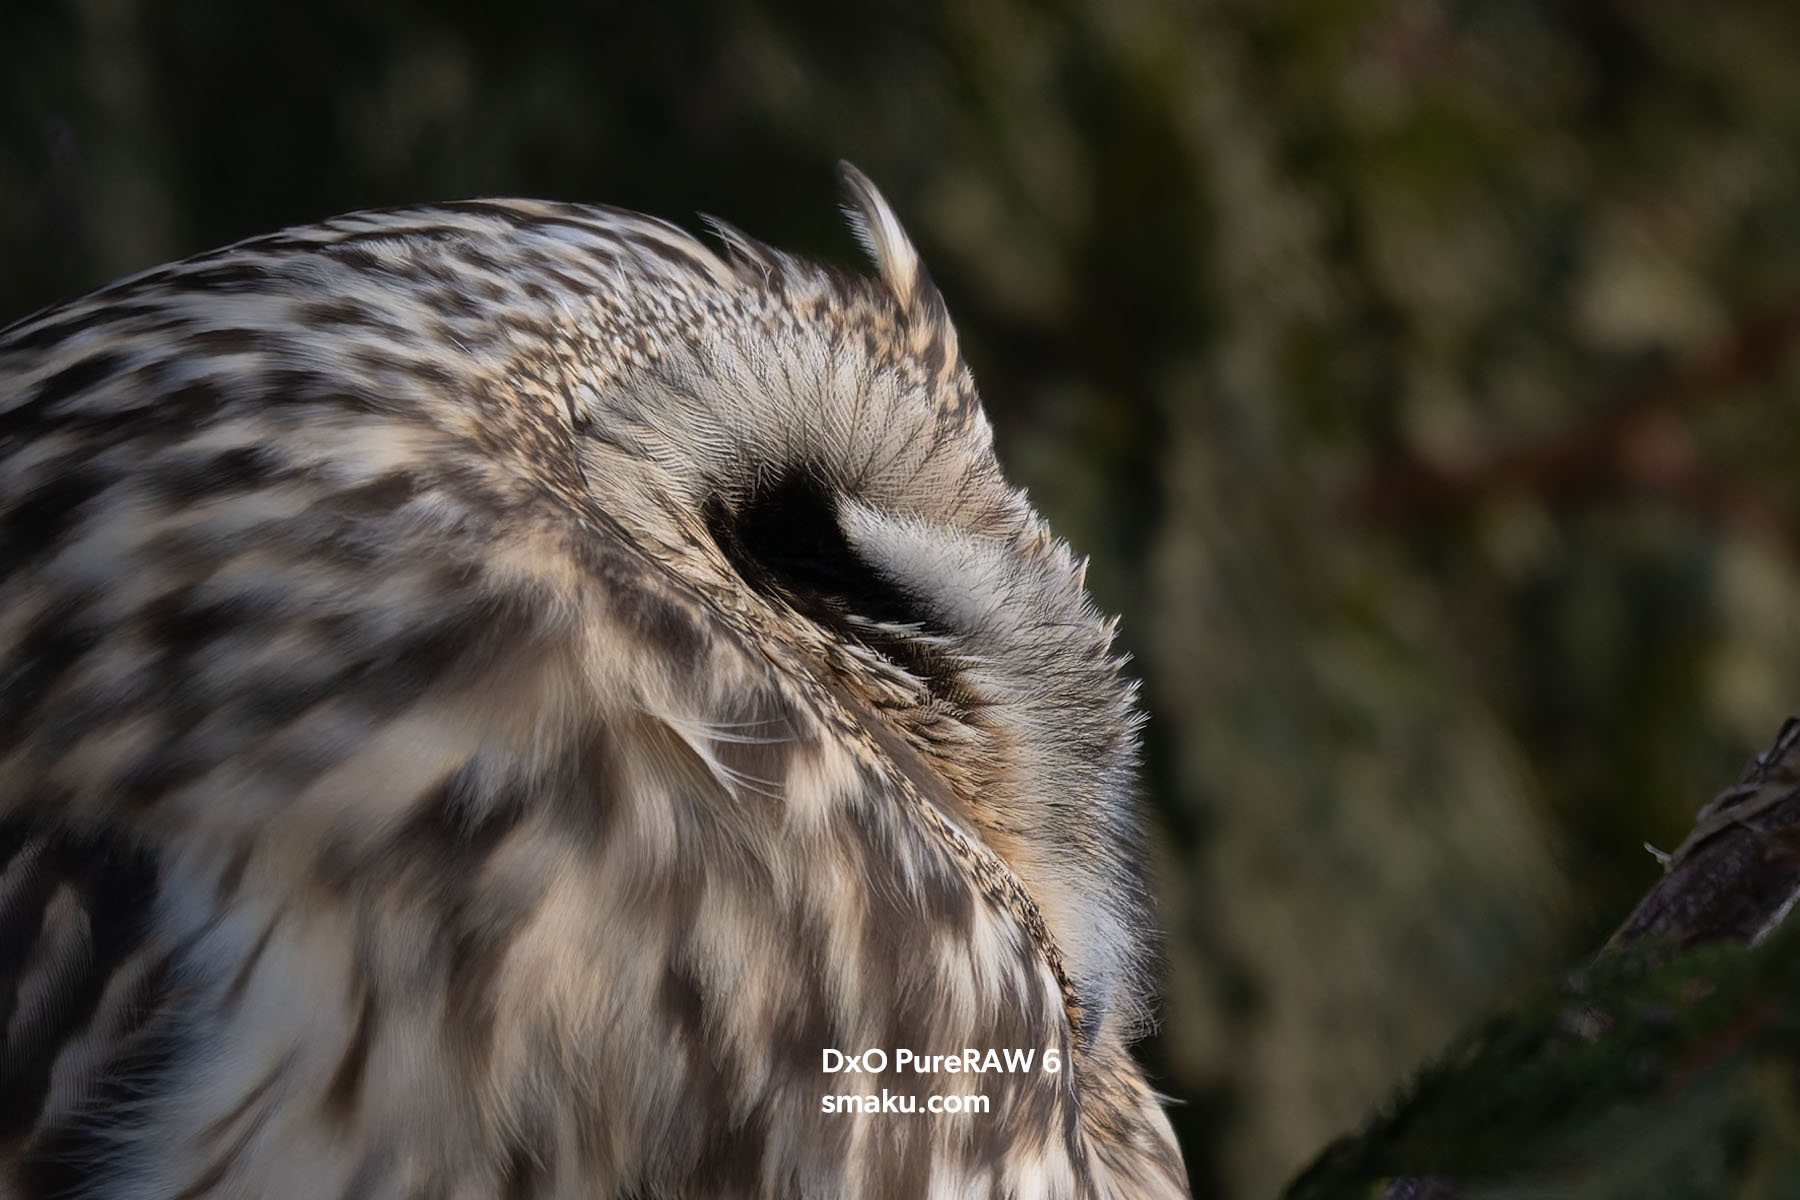
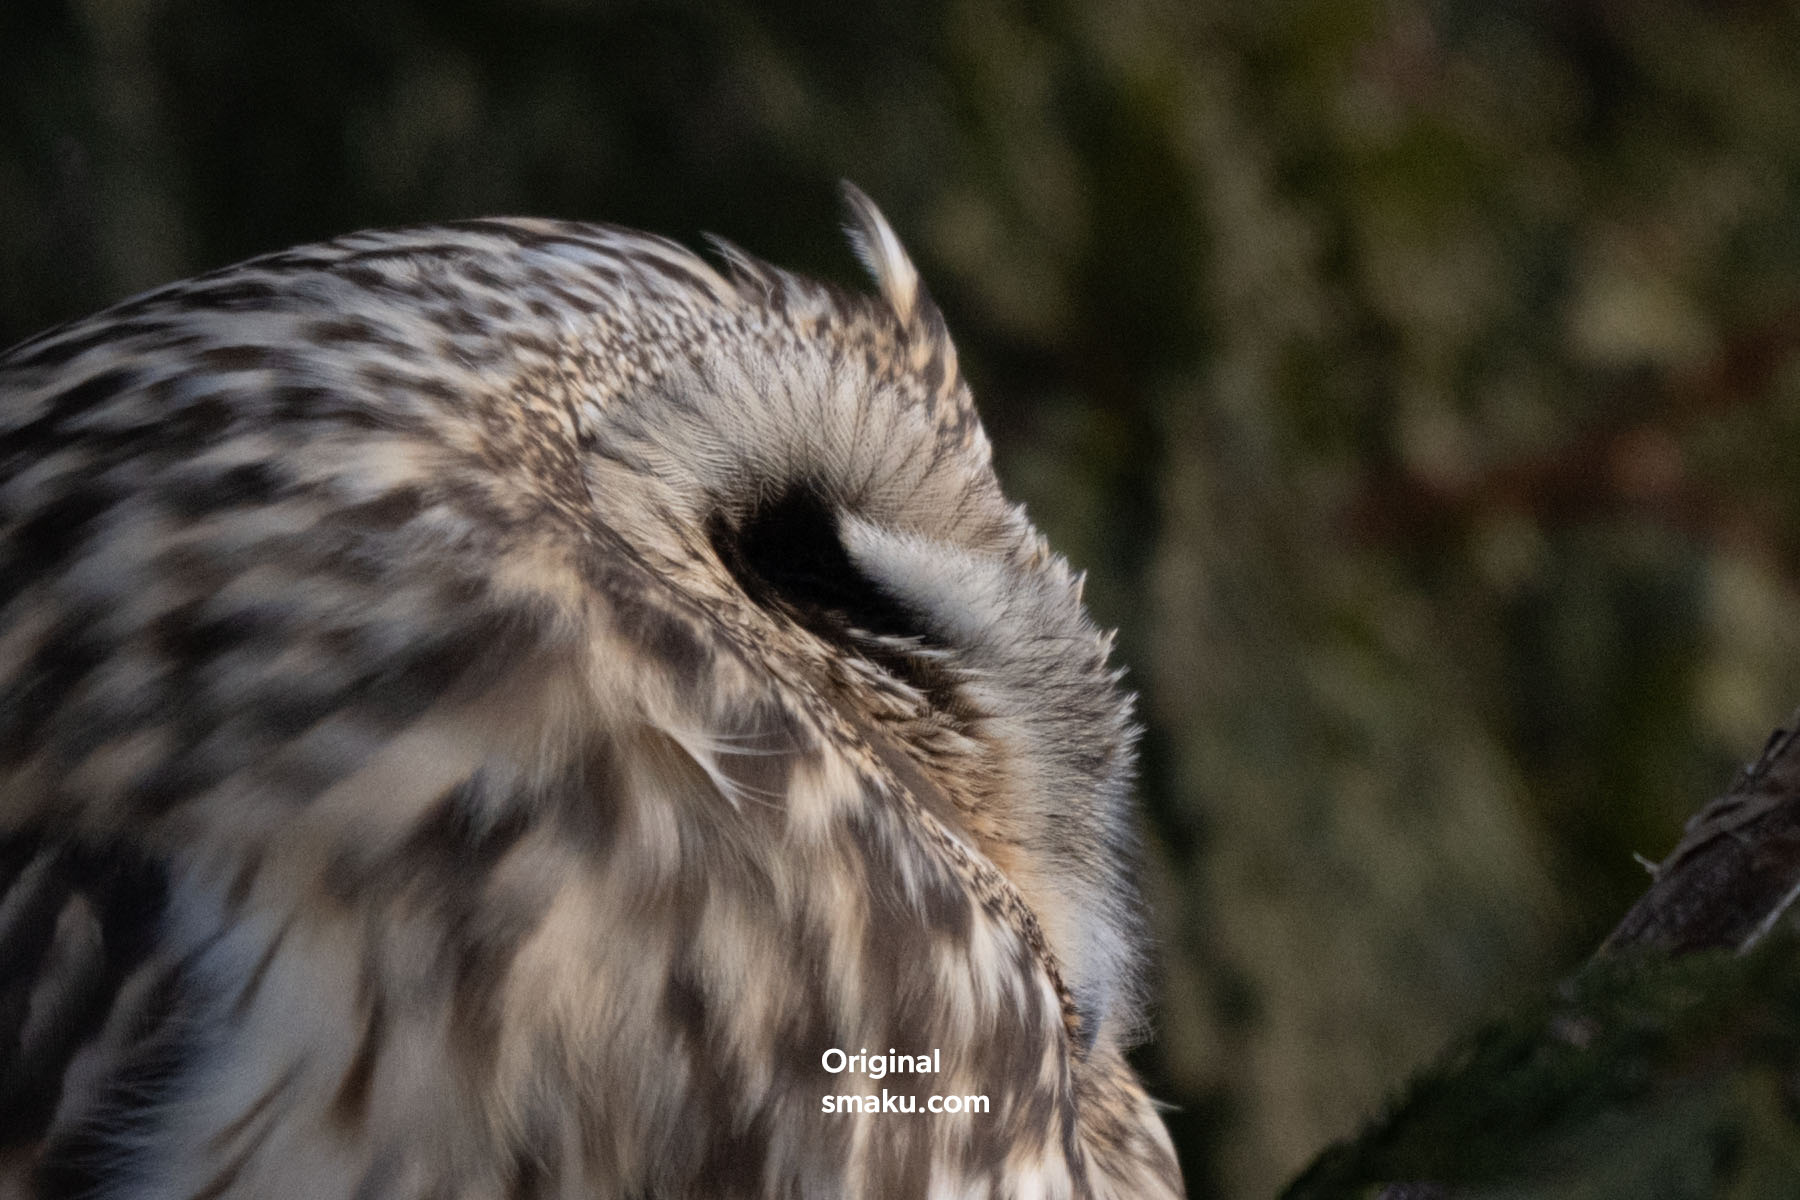
I can see on my computer that the DxO PureRAW 6 version is ever so slightly sharper overall—as seen in the individual hairs of the owl. Comparing both PureRAW versions to the Adobe Lightroom Classic version which had AI Denoise applied and sharpening set to 40, the denoising is very similar, but the sharpness is slightly lacking—albeit you can increase the sharpness with the slider. The lens optimization is also quite different between DxO and Adobe Lightroom.
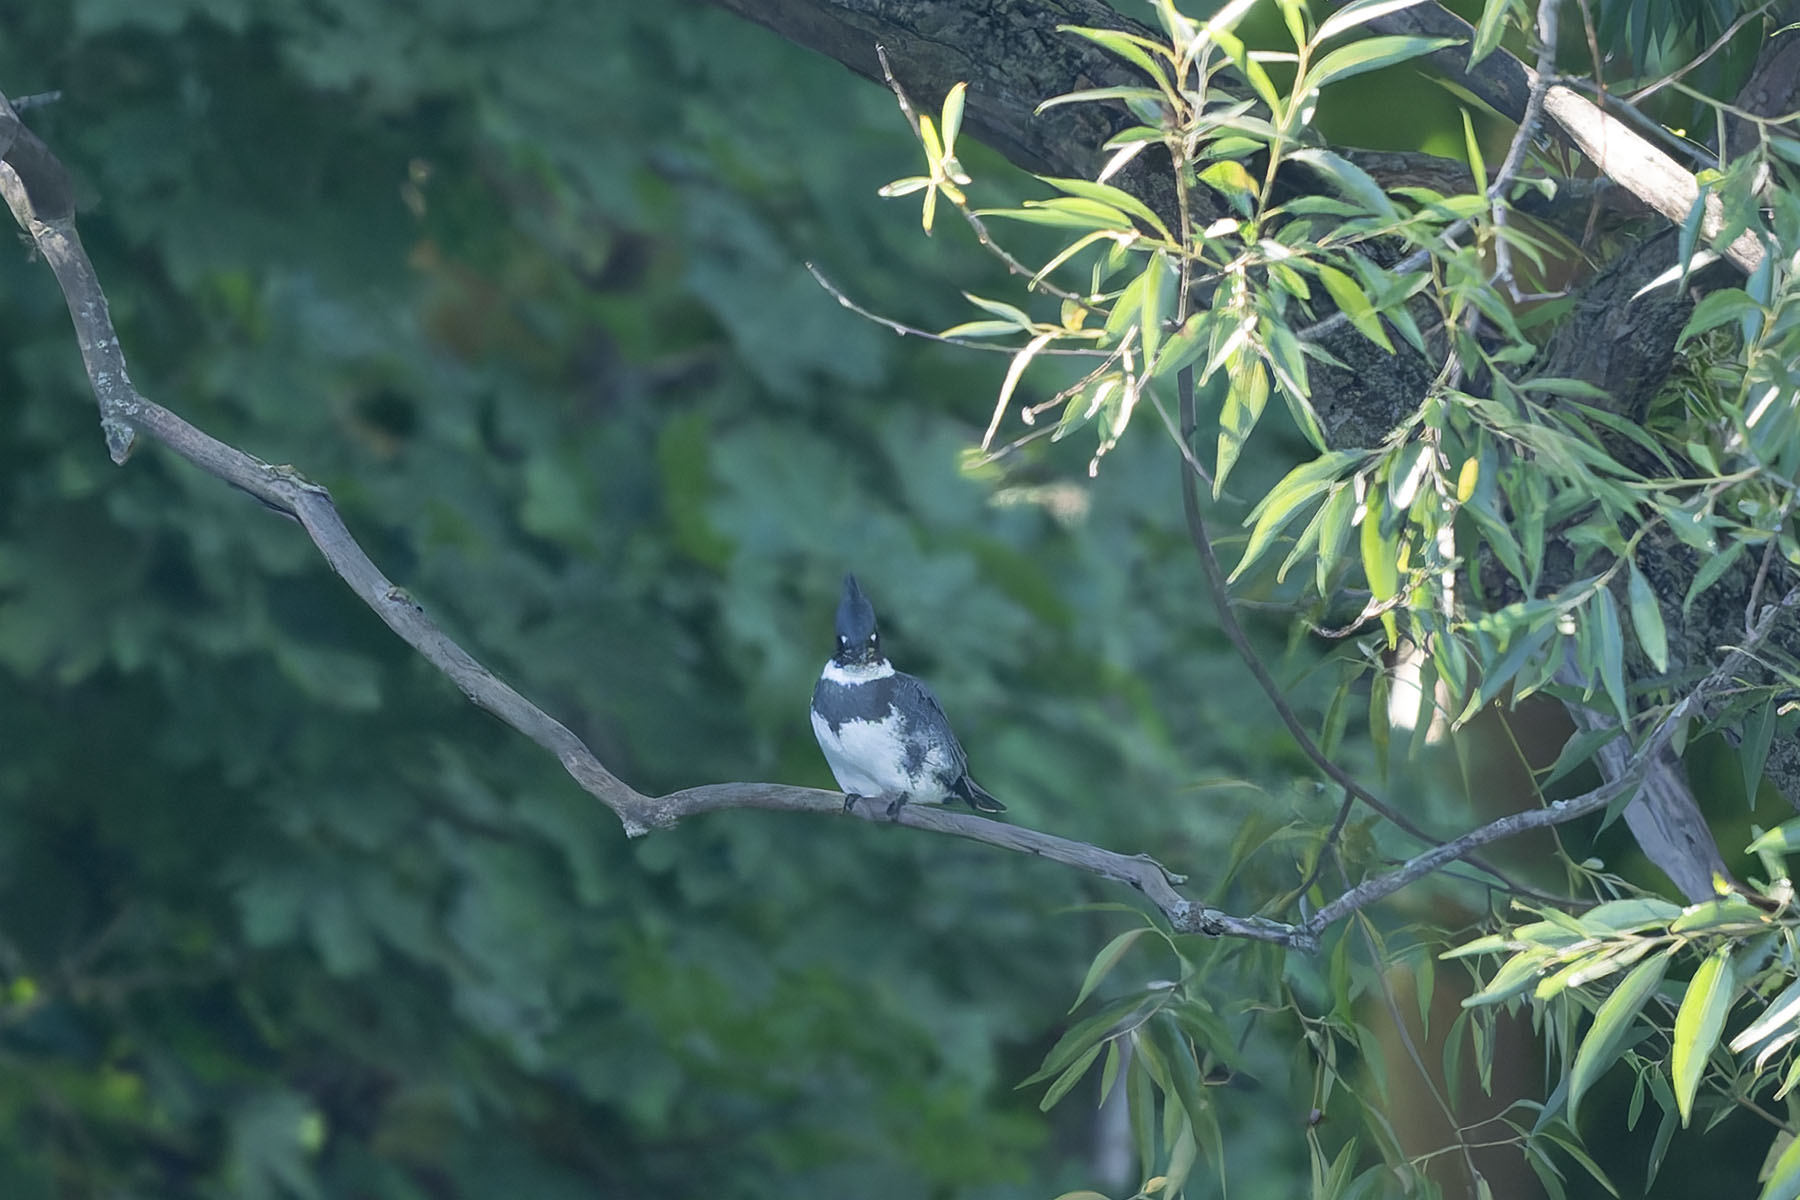
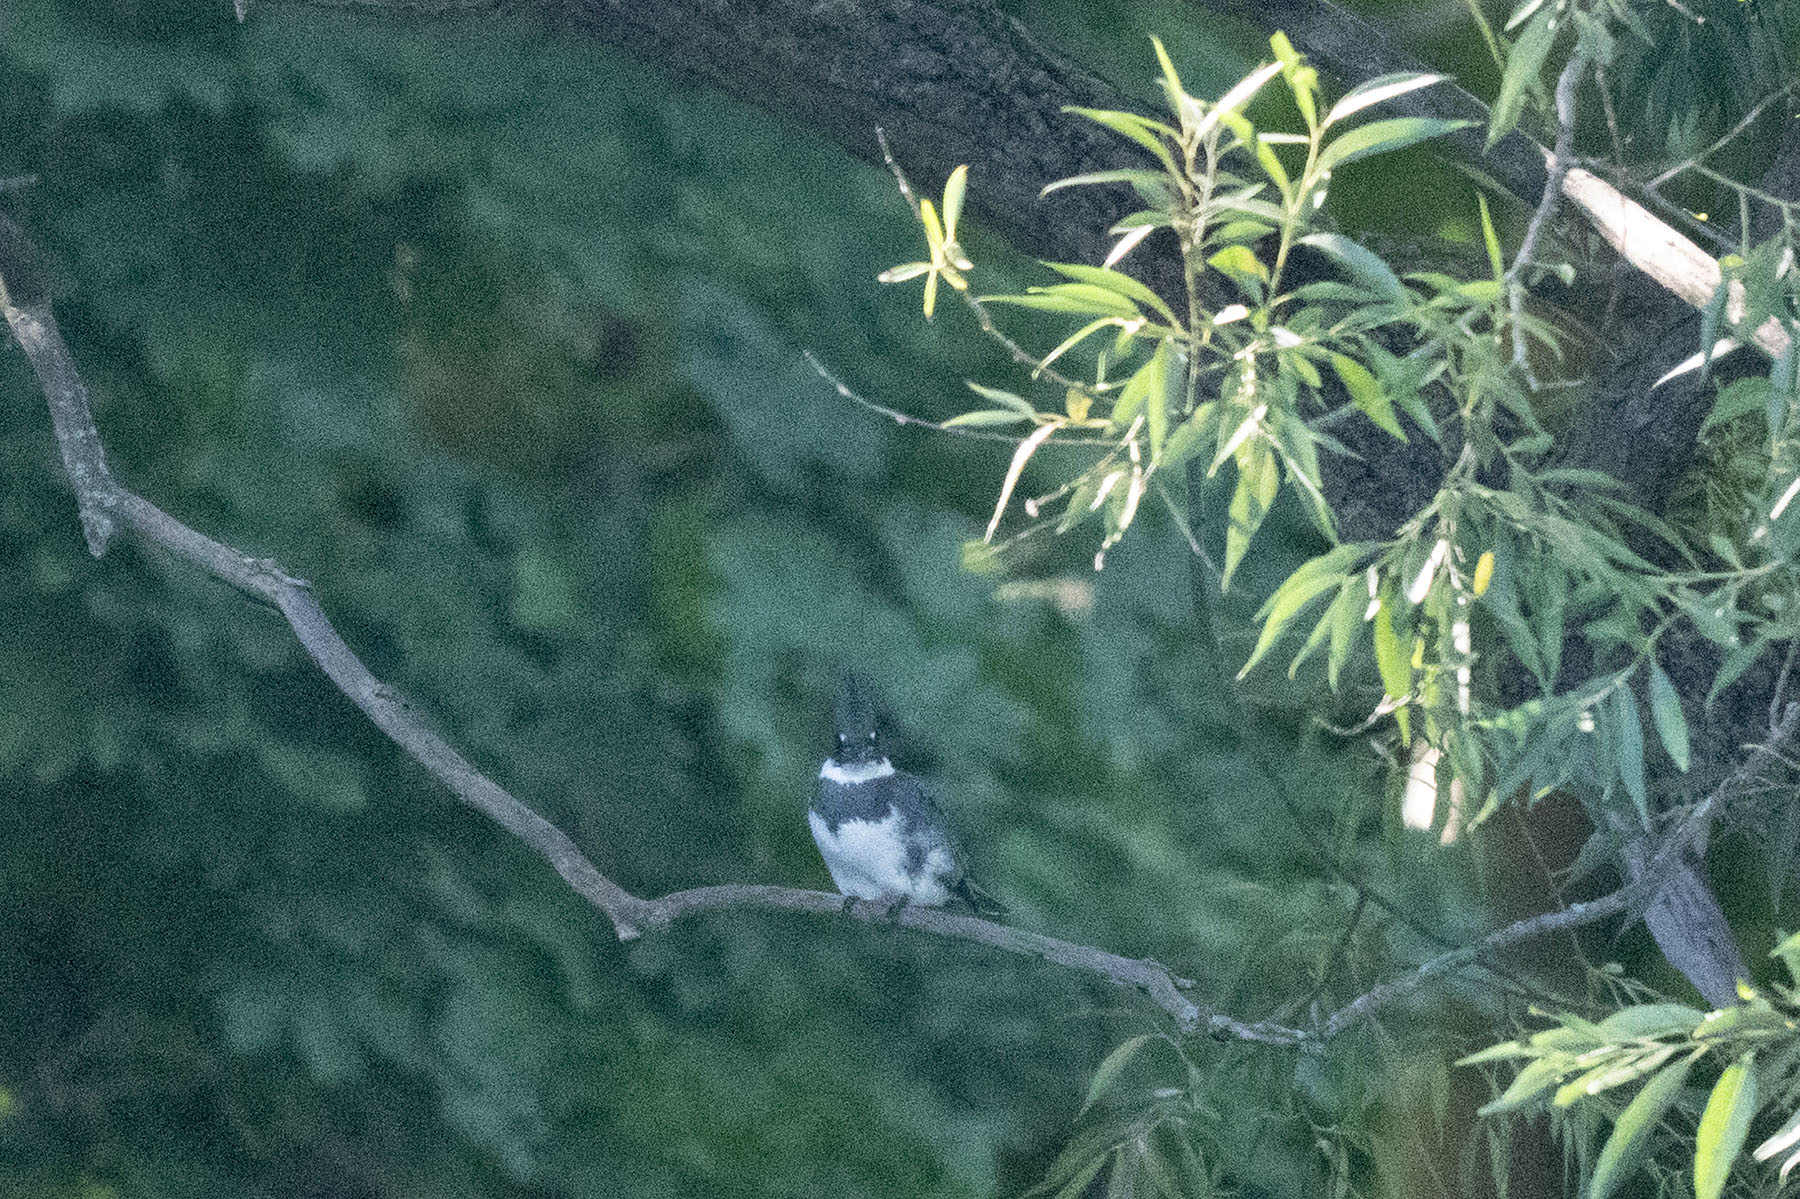
Let’s take a look at another example. This original photo was taken at ISO12800. Click image to enlarge. Adobe Lightroom AI Denoise was applied at 76, and Sharpening at 40.


File Size
One of the major advantages of DxO PureRAW 6 is its lossless compression algorithm. It reduces the resulting DNG file by up to 4x from the previous version—sometimes even reducing it below the original RAW file!
This is hard to believe but I found it to be true for the examples above.
| File | Original NEF | Adobe Lightroom Classic DNG | DxO PureRAW 5 | DxO PureRAW 4 with Lossless Compression |
|---|---|---|---|---|
| Owl | 34.1mb | 58mb | 137.8mb | 26mb |
| Kingfisher | 36.1mb | 77.3mb | 169.6mb | 39.1mb |
Batch Processing
The batch processing in DxO PureRAW 6 has also been improved. By streamlining the workflow, the next file is prepped as the previous file finishes.
I timed processing five different RAW files in one folder:
- DxO PureRAW 6: 2:05.75
- DxO PureRAW 5: 3:05.73
That’s a 33% faster processing time for DxO PureRAW 6!
Pricing
Bought new: US$139.99
Upgrade from previous version: US$89.99
*See below for my 15% off code.
Final Thoughts
It’s clear that DxO PureRAW still has an edge on lens optimization and sharpening compared to Adobe Lightroom Classic. I’ve always thought that Adobe Lightroom has come a long way, especially with their implementation of AI in noise reduction—the little difference in actual noise reduction between the two is indicative of this.
The main advantage of DxO PureRAW is its drastic reduction in RAW file size, and its proprietary lens correction algorithm. The lossless compression does a fantastic job in reducing the overall size of your file, which is something you may want to consider. While the lens optimization performance may not be something critical in nature to some people, it’s still good to know that your images are corrected by a trusted company who has decades of experience in this industry.
Whether DxO PureRAW 5 owners should upgrade to DxO PureRAW 6 depends on if you value the importance of file size reduction. If you’re batch processing a lot of files, DxO PureRAW 6 is also much faster than its predecessor.
These two advantages alone I would consider to be of value well worth the $89.99 upgrade price.
For anyone new to DxO I personally think $139.99 is a small price to pay for what you get with this package. If you don’t use Adobe Lightroom to edit your files, consider the DxO PhotoLab application as it has the same processing engine as DxO PureRAW and also allows you to edit your image for proper exposure and colour. I would image this application should be updated with the latest version of its demosaicing and lens optimization engine in the near future.
YouTube
View my YouTube video where I go through some other examples using DxO PureRAW.
Do you use DxO software in your workflow? Let me know!
Save 15% your purchase of any DxO software by using my name TAKU at checkout on their website: