One of the most interesting solar photographs to make relies on precision planning…and maybe some luck!
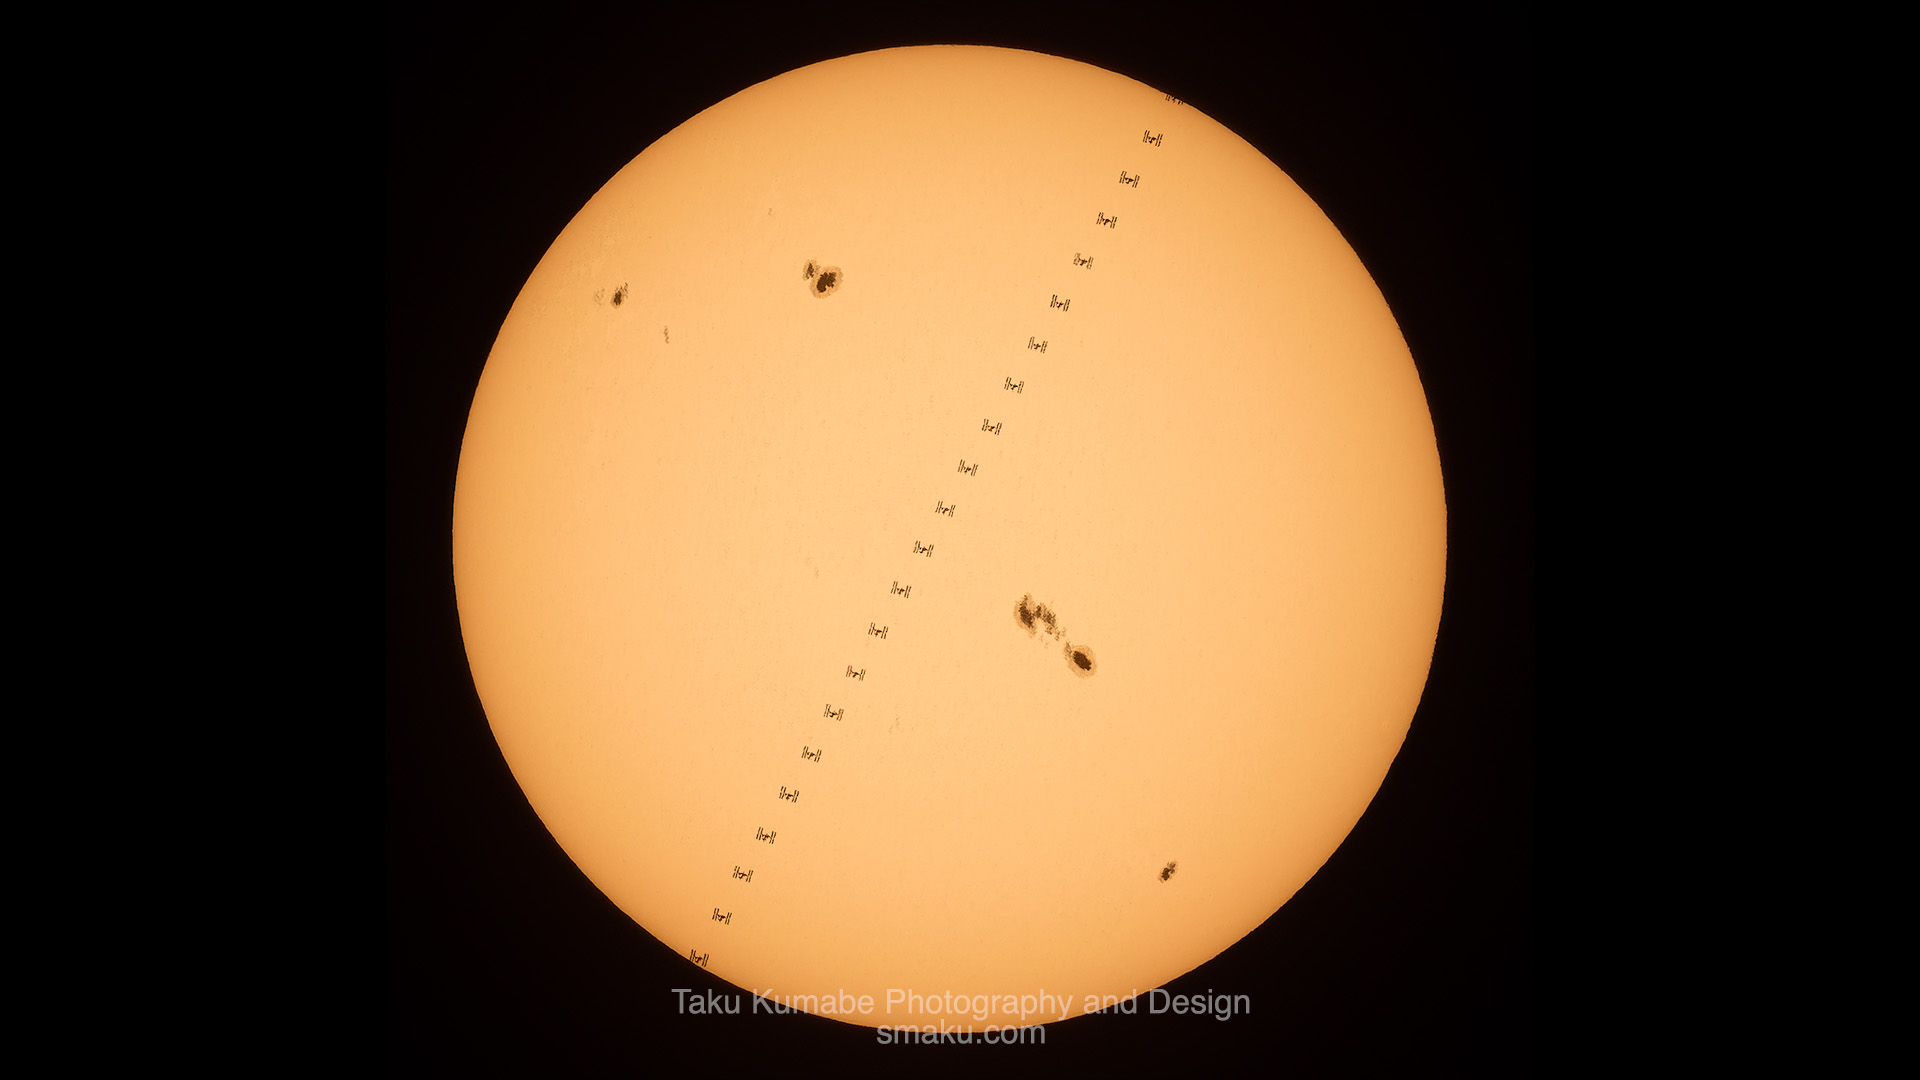
I’ve always loved photographing the sun—and those of you who have followed me from the start know that I frequently do so using just my camera and lens, and sometimes with filters.
I’ve seen many photographs of the International Space Station (ISS) transiting (pass in front of) the sun and moon over the years, which intrigued me in trying to do the same myself.
After researching how to go about this, I came out with the following steps that eventually led me to successfully photograph the ISS transiting the sun.
So follow along as I explain everything you need to know in how to photograph the international space station passing in front of the sun or moon.
For the sake of this blog post, I’ll be using the sun as an example since I haven’t had the opportunity to do the same with the moon. Suffice it to say though, the procedure is the same with the exception of your camera settings and requirements. I’ll note those below.
Plan of attack
Here’s the general set of steps that you’ll need to go through in photographing this:
- Locate the ISS: Use an ISS locating application or web site to find out when the ISS will be passing in front of the sun. I used https://www.transit-finder.com which seems to work well.
- Copy coordinates to Google Maps: Copy the exact location indicated in the app by copying the Longitudinal and Latitudinal coordinates and pasting them inside Google Maps.
- Go to location: Go to this location you found at least an hour before the time of passing so you have enough time to set up and make sure everything is in order.
- Photograph and post-process to your liking.
There are several things to note for each of the above steps so let’s get into all the details below.
Step 1: Locate the ISS
The https://www.transit-finder.com website is a good place to find where the ISS will be transiting the sun.
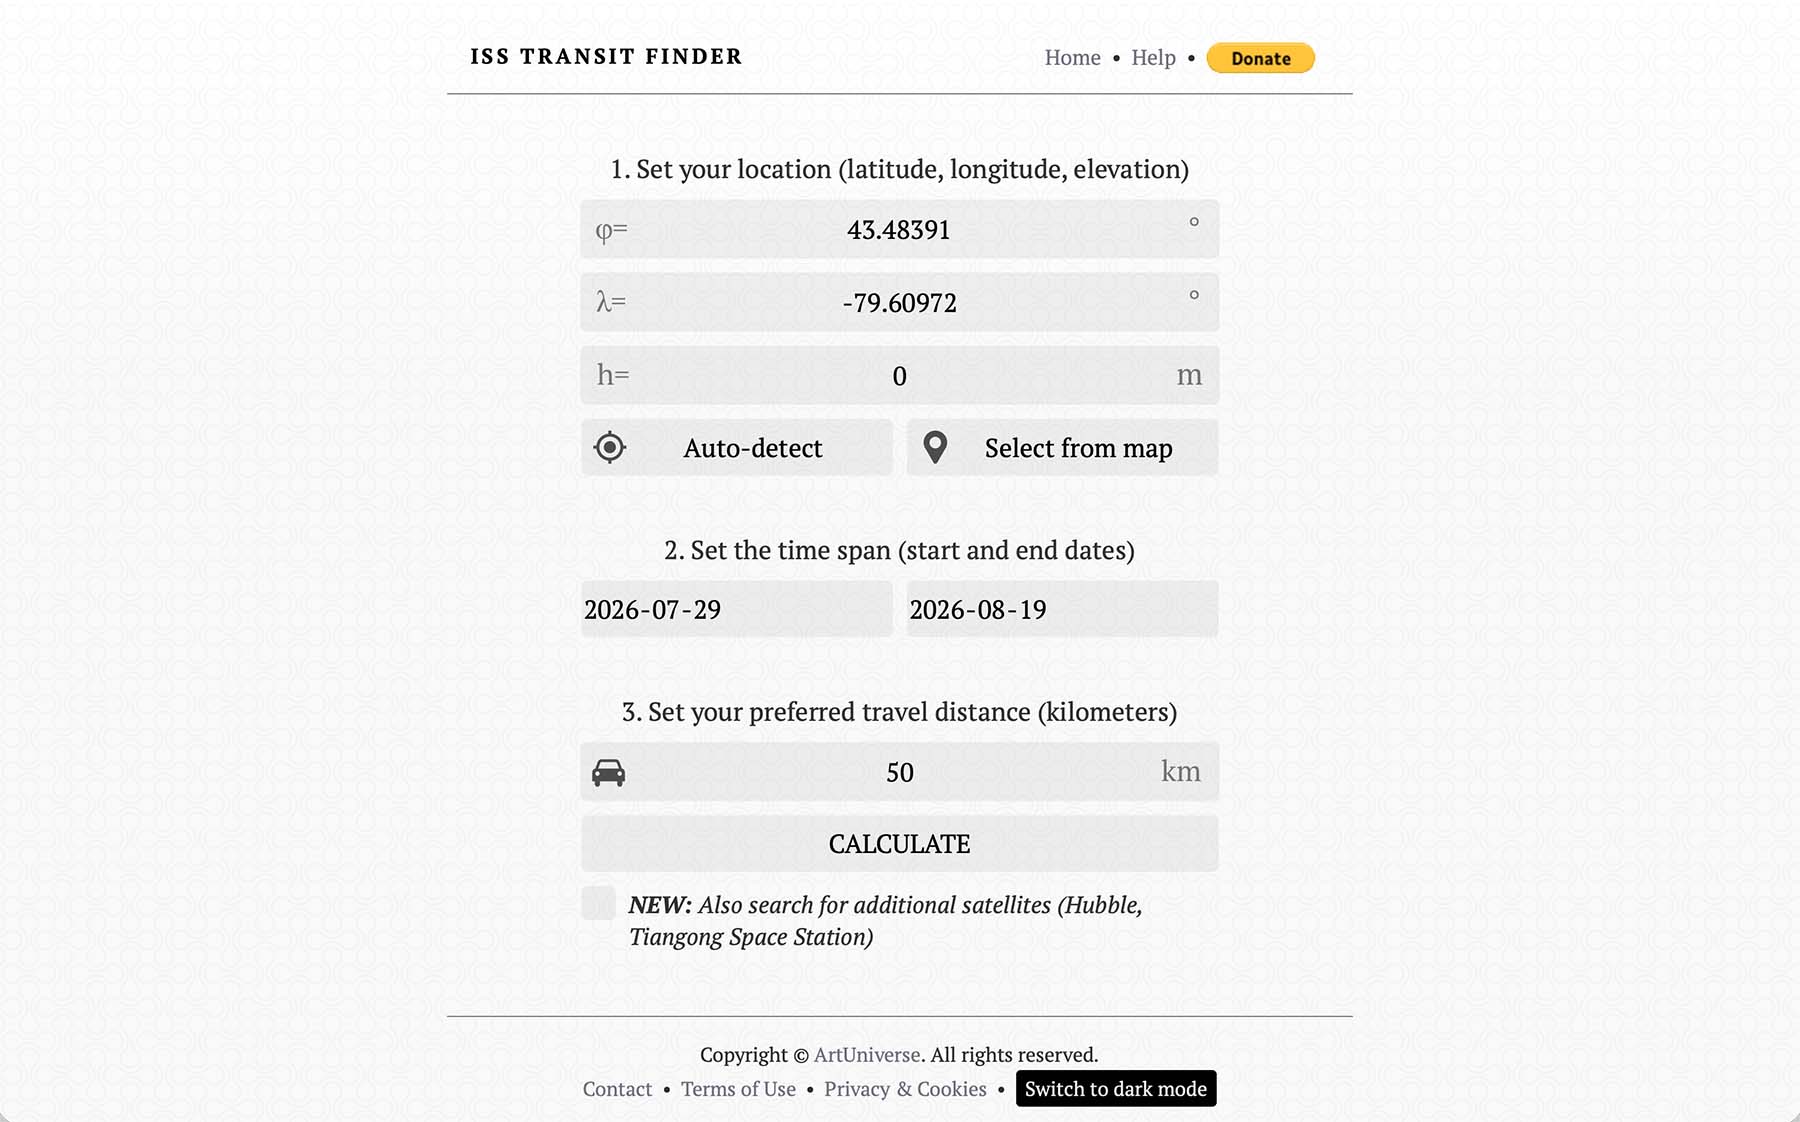
Section 1 tells the app where you are looking from. Don’t worry too much about the exact location here. Just enter in the location of your home base for now, or if there’s a specific park or location you want to photograph from, choose Select from map and set your location.
Section 2 allows you to search for a date in the future for when the ISS will pass. Note that any date past the two week mark will not be accurate. Also note that even if you find a date within this range, ISS travel routes can change, so use this as a general guideline.
Section 3: Set this to the furthest distance you’re willing to travel to, from the location set in Section 1.
Press Calculate.
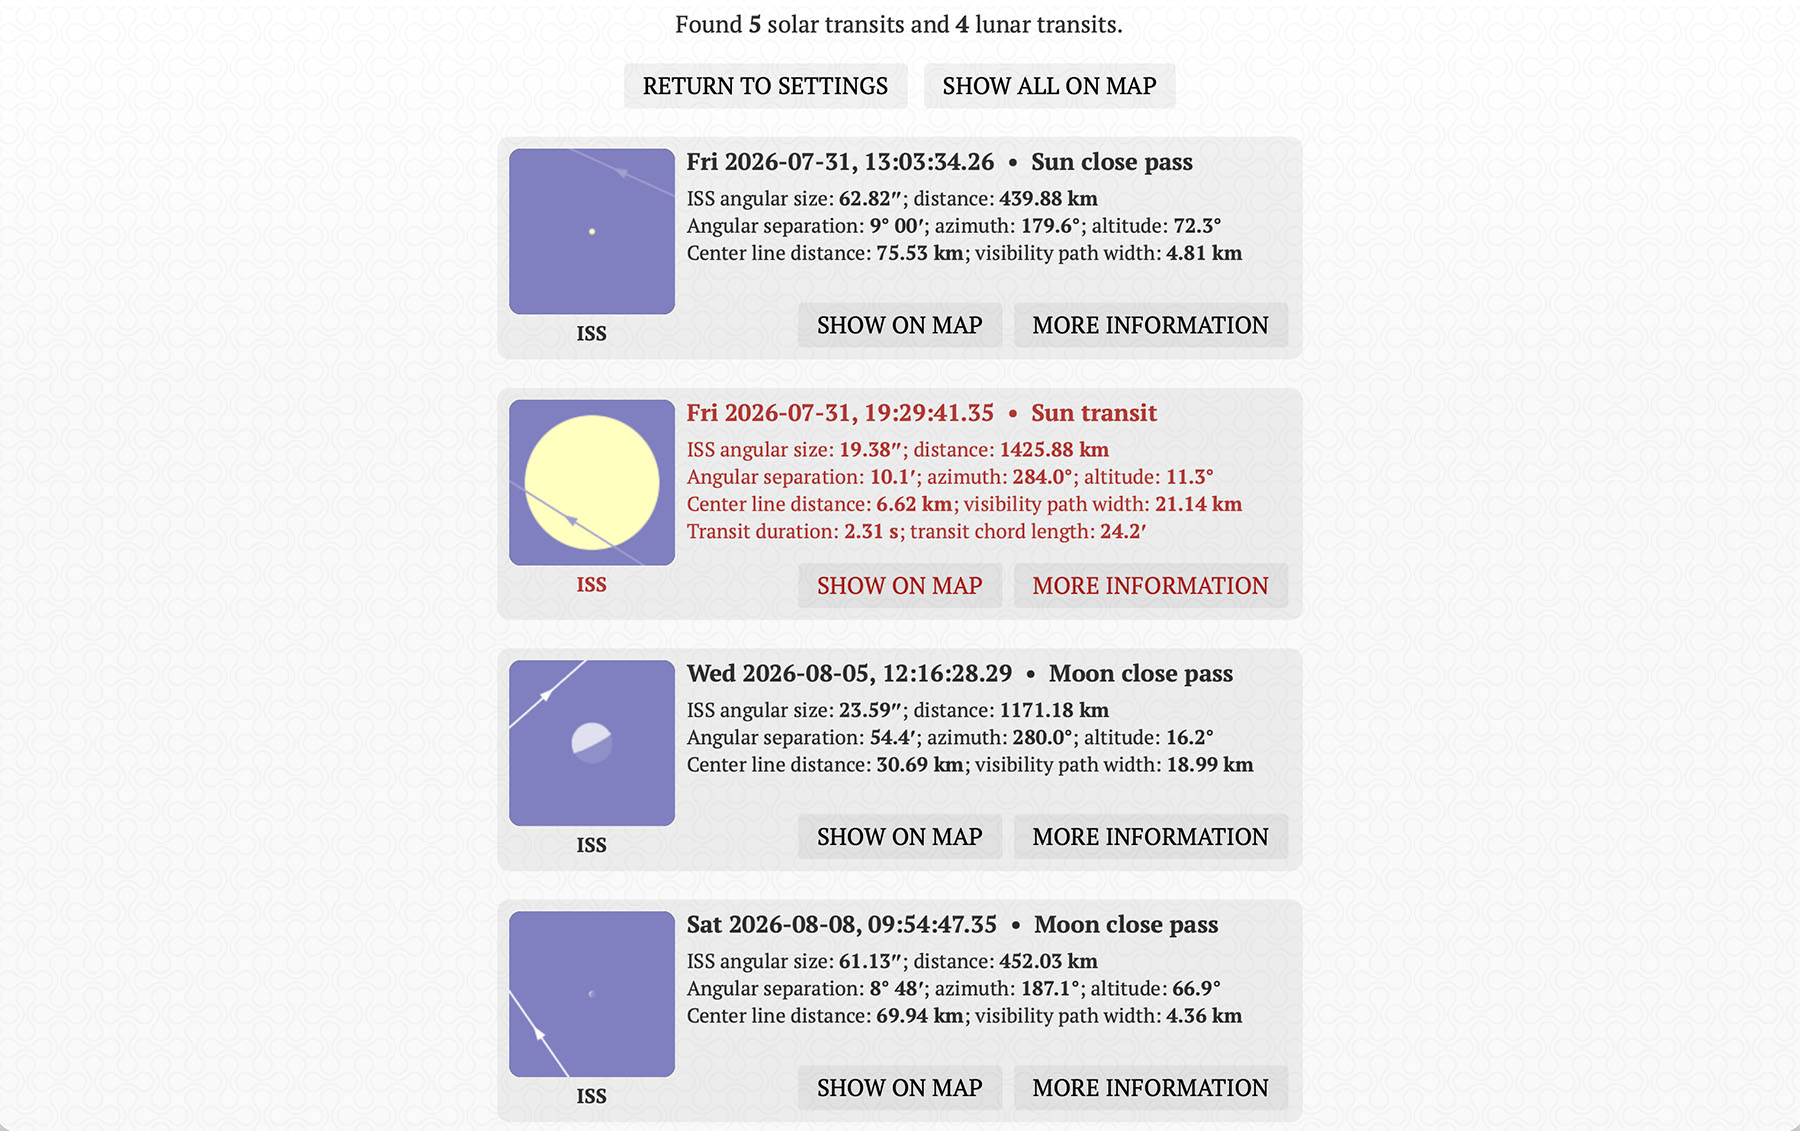
The next window after you press Calculate will display the nearby passes of the ISS from the sun or moon. Any results highlighted in red mean there is a direct passing of the ISS in front of the sun or moon.
Select this date to show on the map.
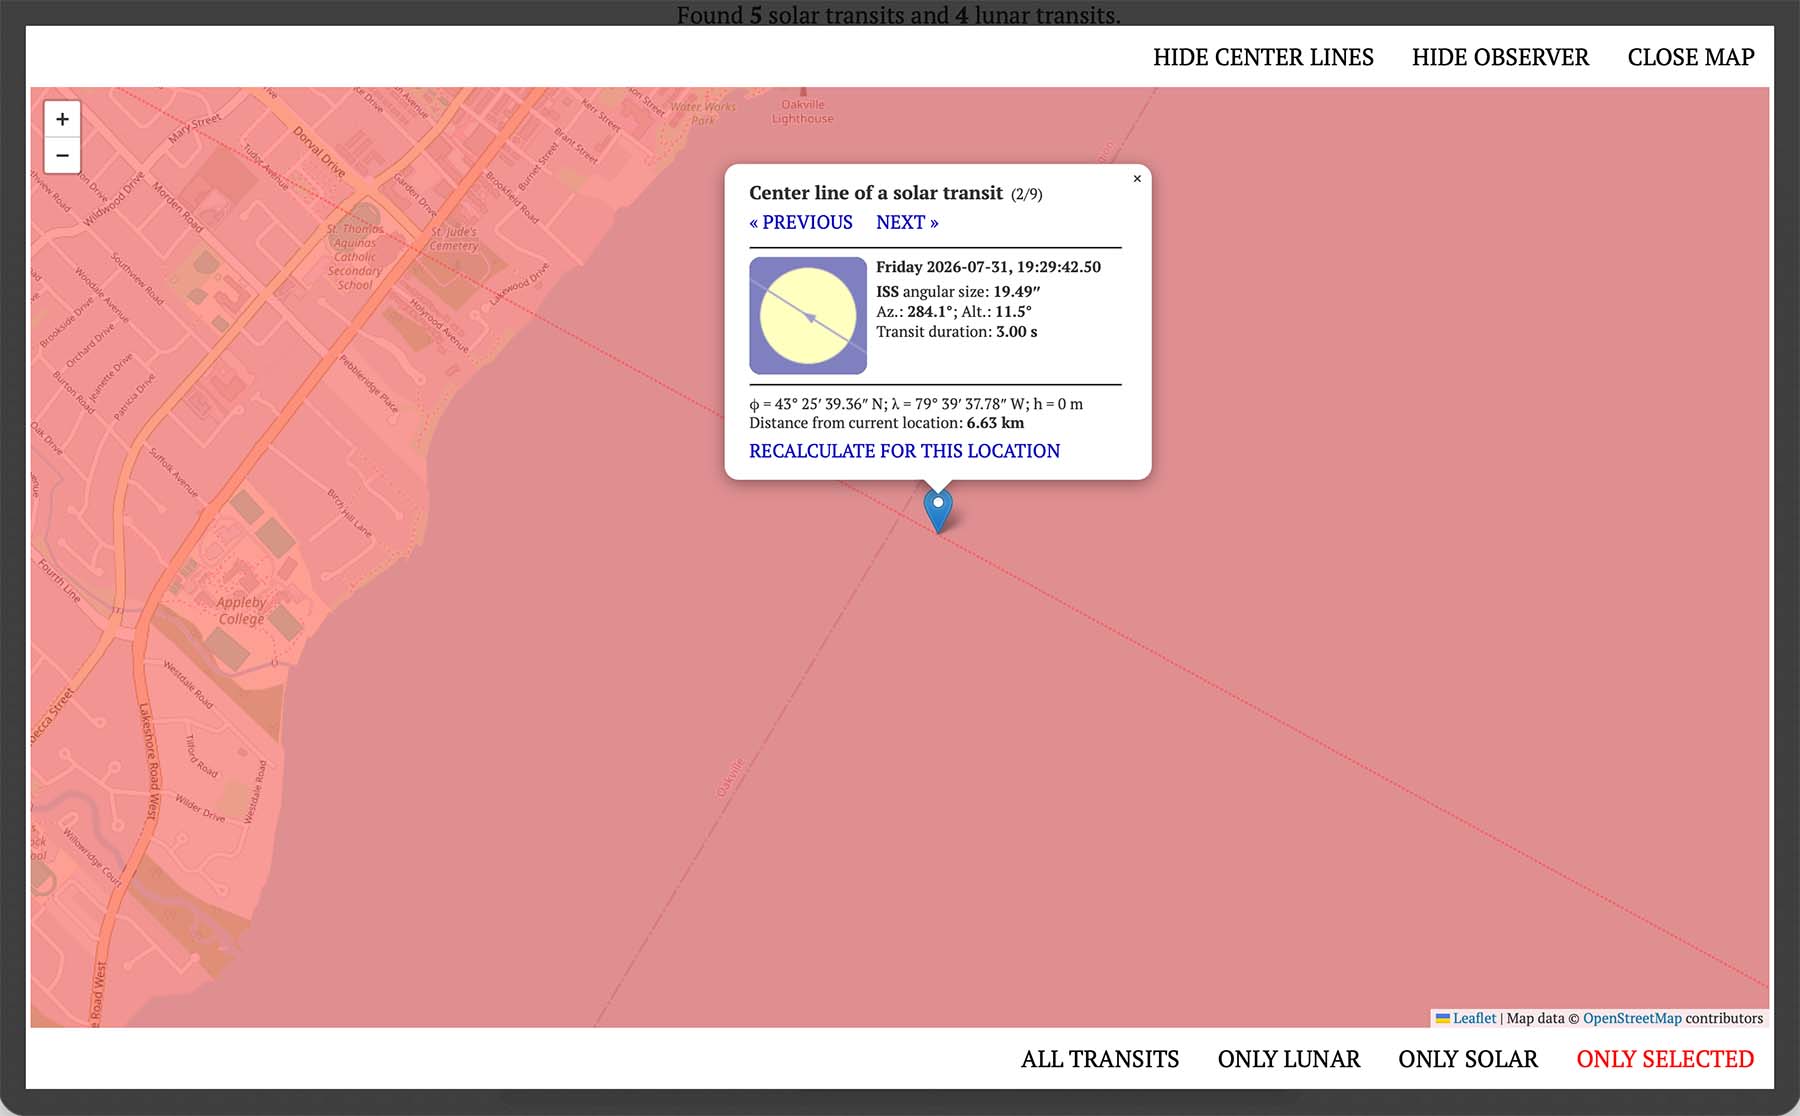
The map will show you a location where the ISS will pass in the middle of the sun or moon, within the KM distance you stated you’d travel to from your original location. More often than not, this location is located in some area you’re not able to go to. The most important thing to note here is the dotted red line the point is on. Anywhere on this dotted red line will allow you to see the ISS pass through the middle of the sun, so search around the map and zoom in until you find a good location where you can set yourself up and photograph.
Some ideal locations to photograph the transit:
- Public parks
- Parking lots
- Open fields
- Areas where the parking lot is nearby so you don’t have to travel far with all of your gear
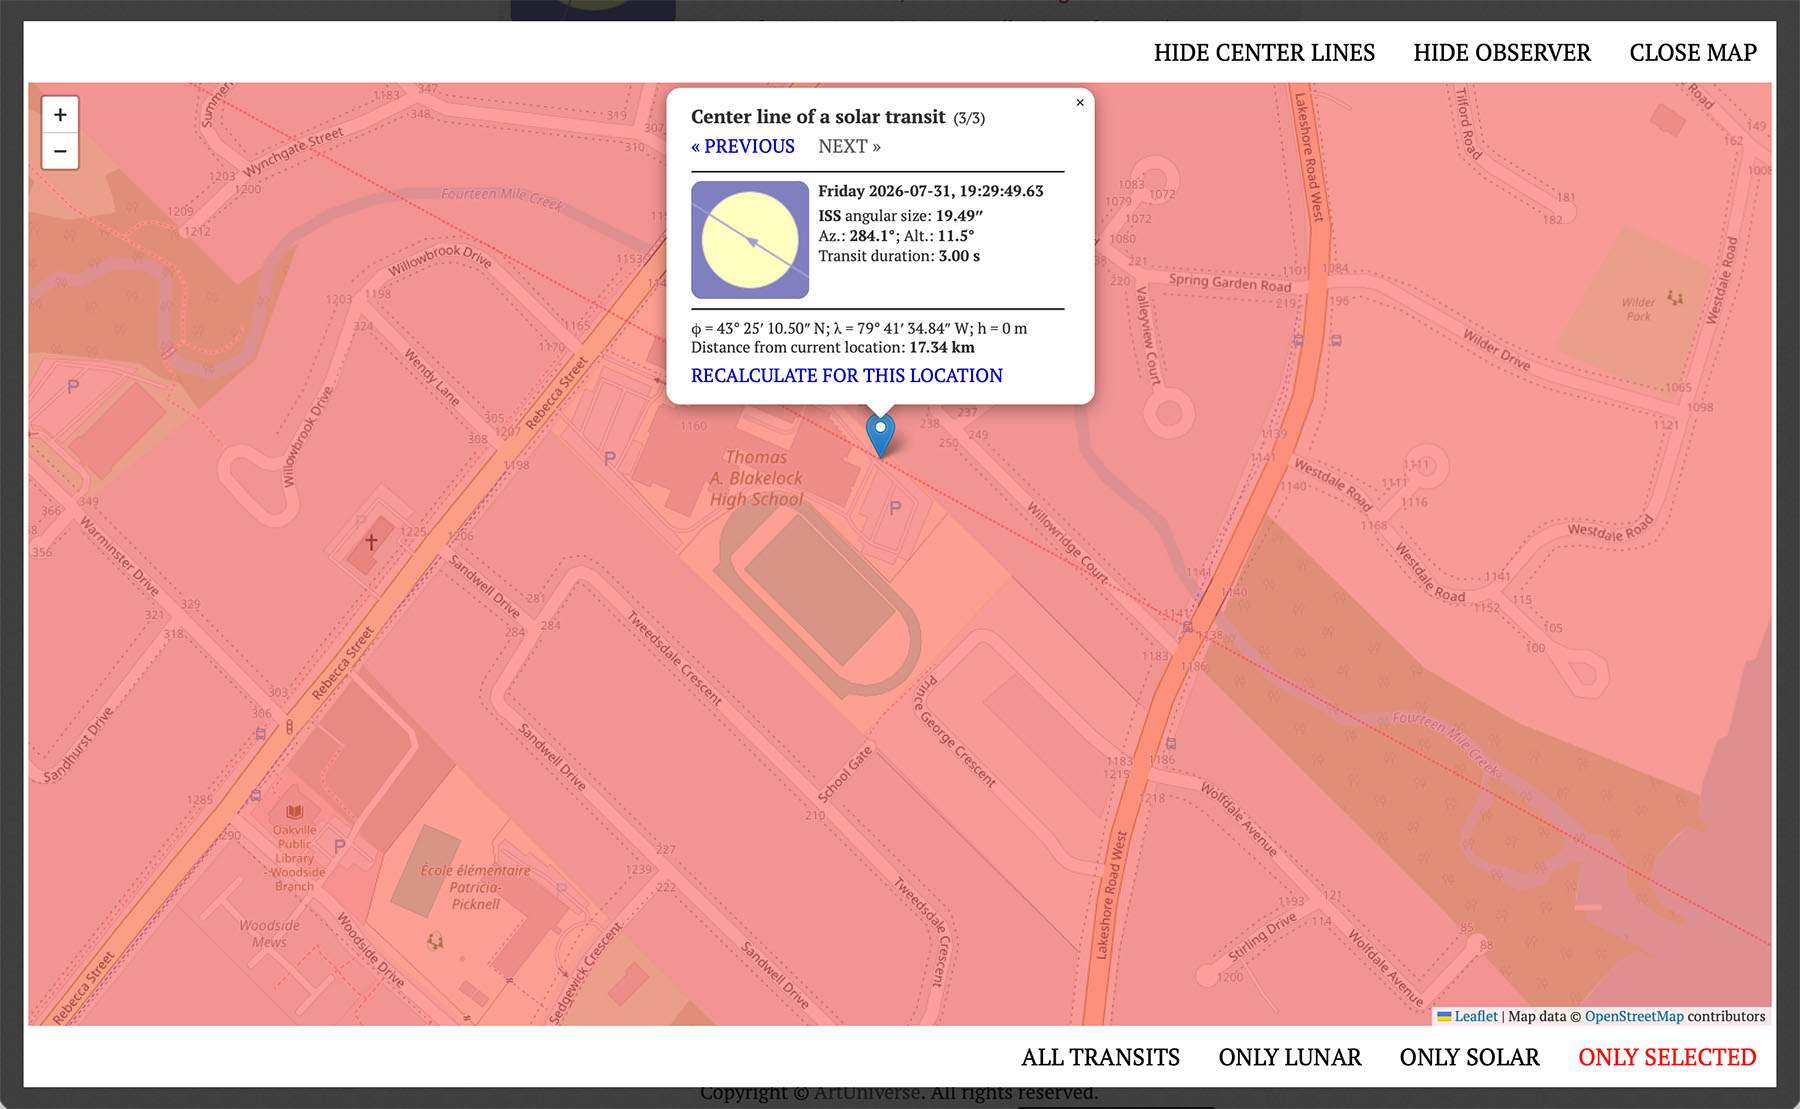
Here’s a location right at the edge of a parking lot. It’s a perfect spot since I don’t have to travel far with all of my gear. So what does this pop-up window actually tell me? Let’s take a closer look.
- Date and time of ISS transit the sun. This is the atomic time set to your time zone. This is the time you’ll be pressing your shutter button on!
- ISS Angular Size: This indicates the approximate size of the ISS as seen from where you’re standing, measured in arcseconds. (1 degree = 60 arcminutes = 3600 arcseconds) Anything above 40″ (arcseconds) is ideal in that the ISS will be big enough so you can discern details of the solar panel and station itself. Anything below this will make it more difficult. In fact, at 20″ as seen in this example, you’re likely to just see a black shape crossing the sun with very little detail, if at all. The ISS is at the closest point to Earth (around 400km) when it is directly above you, and furthest from Earth (around 1000km) near the horizon.
- Azimuth (Az.) indicates the clockwise angle from North you need to look at for the direction of the sun.
- Altitude (Alt.) indicates the degrees above the horizon the sun will be at this time.
- Transit duration: Indicates how long in seconds the ISS will be passing in front of the sun. Typically it will be anywhere from 0.5 seconds to 1 second for a decently sized ISS transit. In this example, 3 seconds is a long transit period, further indicating that the ISS will be small in size, taking longer to transit the sun.
Step 2: Copy to Google Maps
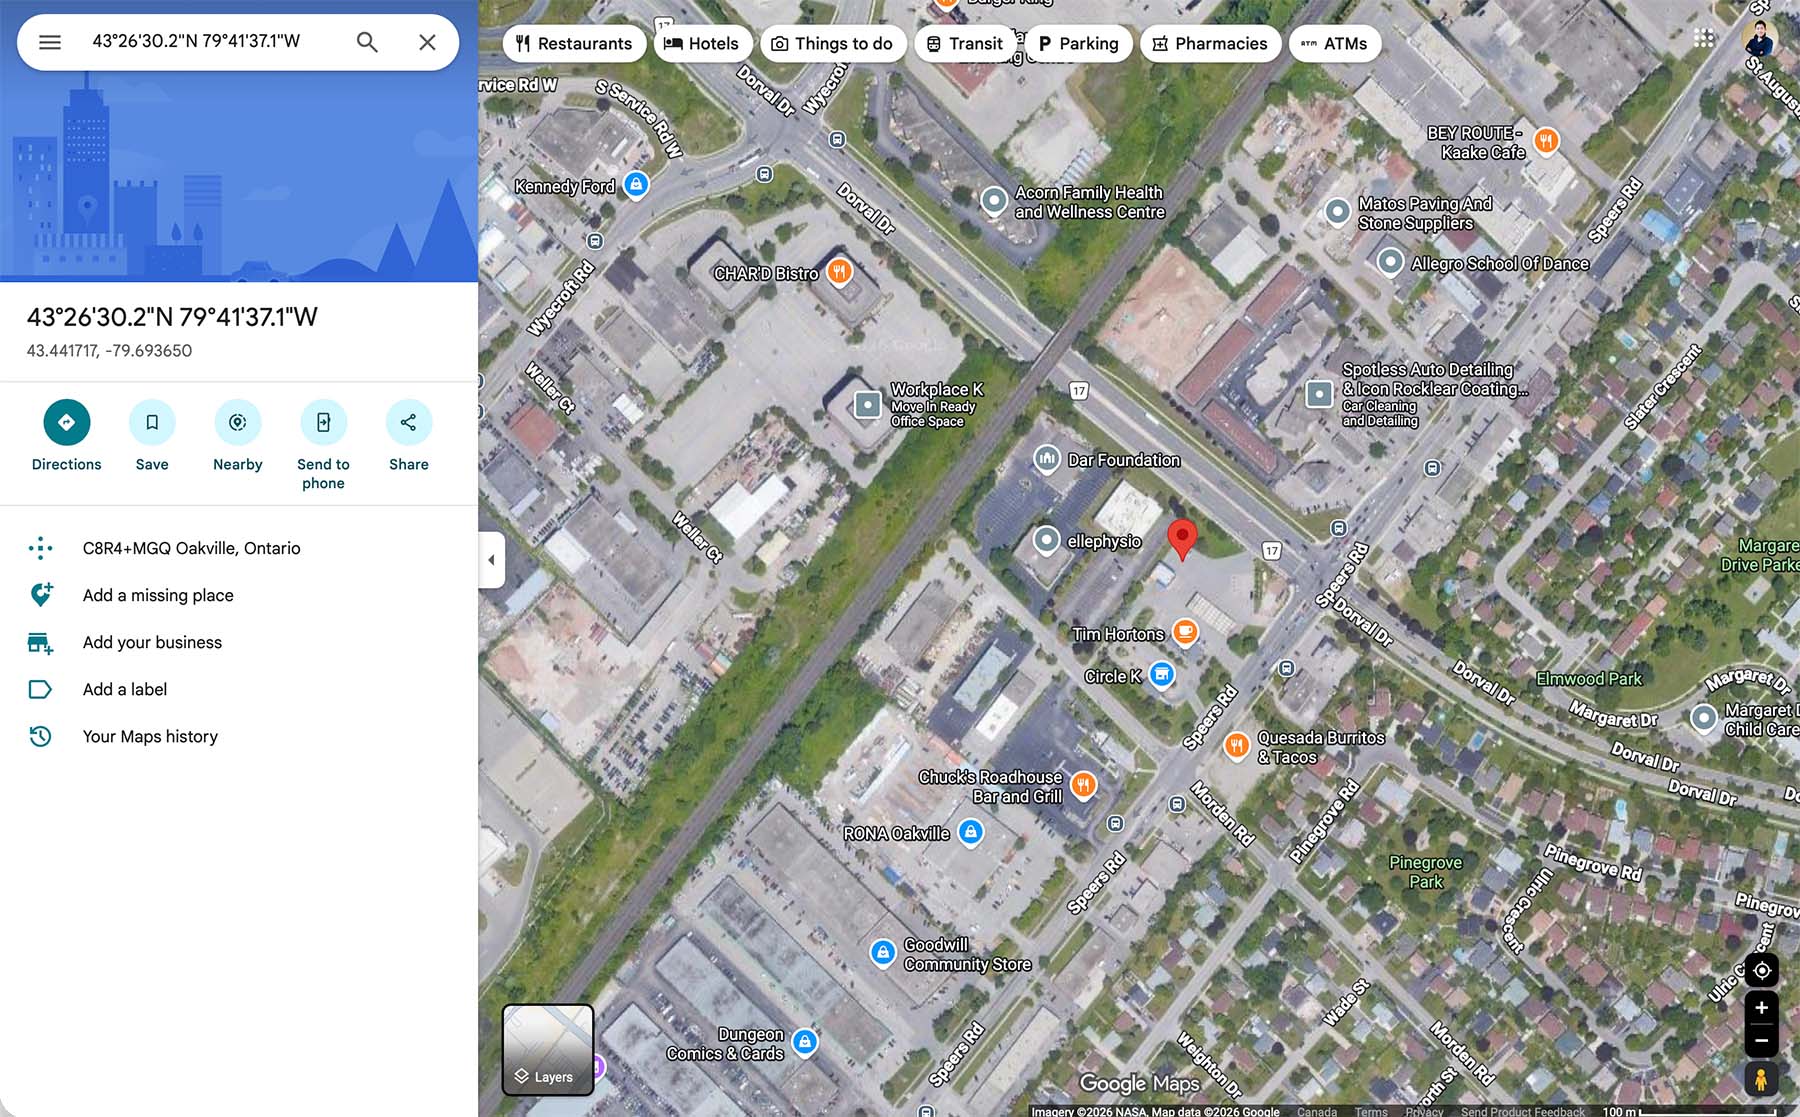
Once you’ve found a good and safe location to be in, copy the Longitudinal and Latitudinal coordinates into Google Maps to give you the precise location you need to be in. Just enter the digits and direction as seen in this photo below.
The day before
The numbers that you get from the transit-finder.com website are as accurate as they can be when you searched for them. The path of the ISS may change over time so the time of passing and its path of travel—hence where you need to be—may change over time as well.
So, at the very least, do all of this checking the day before the actual date to see if everything is still in order.
What’s the time?
Timing is important so I would recommend syncing the time on your camera to the atomic time. This becomes even more important if you’re using more than one camera. Sync your camera(s) with the atomic time so that you can easily reference one camera’s output with the other.
My personal experience
My Nikon Z 9 and Z 8 were not properly synced with the atomic time. In fact, the time on my Nikon Z 9 was four minutes off from my Nikon Z 8, which was two minutes off from the atomic time. This made cross referencing the exact moment a little cumbersome when looking at the results from both cameras.
So that you can keep track of the time, I downloaded an atomic clock app that displays a more exact time, rather than relying on the clock on my iPhone which could easily have been set incorrectly. I used the Atomic Clock iOS app from the App Store, which is free to download.
Step 3: Go to location
If you can, double check the location a couple hours before to see if nothing has changed.
My personal experience
I made this mistake on my first attempt at this photo. I didn’t check until afterward and noticed the trajectory had changed from when I first did the search. Hence, I did not see the ISS through the sun from where I was standing!
Be at the location at least one hour before the time of the passing so you are not rushed in finding the proper spot and setting up your camera.
Timing is everything
You have the exact time the ISS is to pass in front of the sun. But as mentioned before, the trajectory can change, altering this time. While there’s no way of knowing how the time changes, I would start carefully monitoring and photographing or taking the video at least a minute before the actual time.
And if you don’t see it, continue to photograph and film afterward for another minute or so until you do see it come across.
My personal experience
I started filming and photographing about a minute before the actual time. Constantly looking at the video to see if something passed, I didn’t see anything even after a minute after the scheduled time. I kept photographing anyway, just in case, taking short breaks between burst sessions.
Thinking that I didn’t capture the ISS, I left the files on the memory card for a few days until I decided to check the video. I noticed a dark shadow pass through the sun! It was so out of focus though, that it couldn’t have been the ISS. It turned out to be a bird after closer inspection.
Regardless, I decided to check my images to see if I had caught whatever it was. Checking through the hundreds of images, you can only imagine my surprise when I came upon the first image with the ISS entering the sun! Continuing on through the rest of the images I was even more excited to find out I had indeed caught the entire transit in one of my burst mode sessions.
Checking the time on these images, it turns out the ISS had crossed the sun about 10 seconds before the indicated time on the website. It just goes to show that planning and a little luck can make or break the shot!
The camera and settings
For my outing, I had two cameras and lenses with me:
- Nikon Z 9 with Z 800mm f/6.3
- Nikon Z 8 with Z 180-600mm f/5.6-6.3
Both combinations had my solar filters on it as seen below.
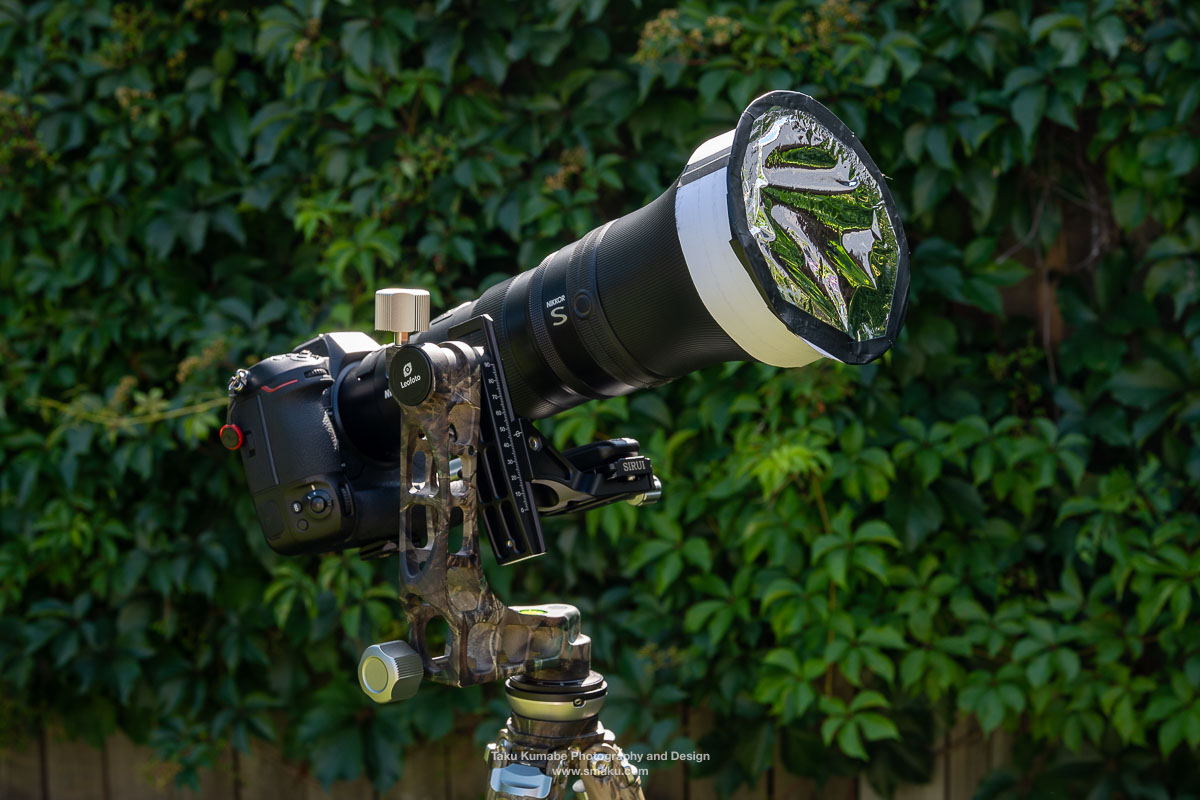
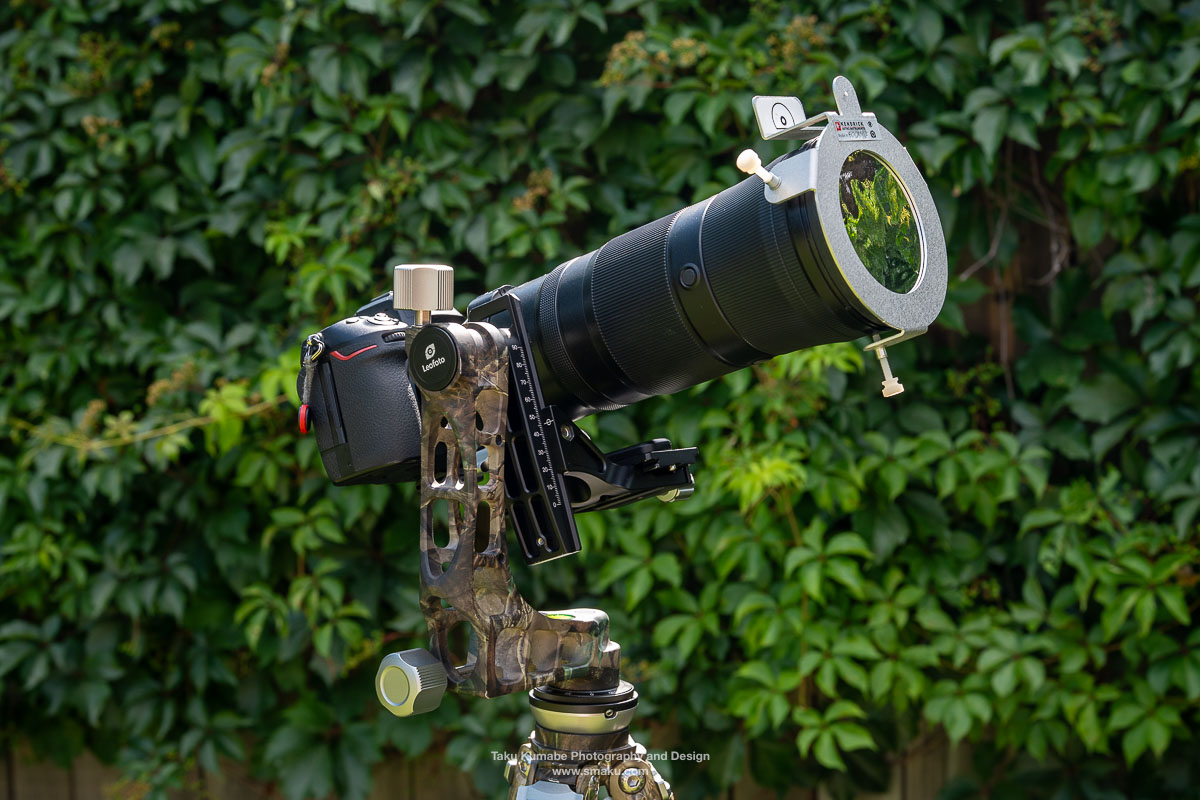
Solar filters are necessary if you’re taking photos of the sun, but not the moon. The filter allows you to properly expose for the sun and not have it blow out in your photos.
My Nikon Z 9 with Z 800mm was for taking photos and my Nikon Z 8 was for taking a video of the passing of the ISS. These were my settings for each camera (your camera’s settings might differ slightly):
- Nikon Z 9: 800mm, f/6.3, 1/4000 sec., ISO500
- Nikon Z 8: 600mm, f/6.3, 1/250 sec., ISO800, filmed at 120fps
If you’re taking photos of the moon, simply expose for the moon without a solar filter attached.
Note the shutter speed of 1/4000 sec. The ISS is moving at an incredibly fast speed of 28,000 km/h (17,500 mph), so it’s important to have a fast shutter speed to freeze the movement. Even if you’re photographing the moon, set the shutter speed to around 1/2000 sec. to 1/3000 sec. to ensure sharp details of the ISS.
To burst or not to burst
For photos, use burst mode on your camera since the timing needs to be precise to capture the entire transit. Set your camera to the fastest burst mode rate. For my Nikon Z 9 it was 20 frames per second in RAW format.
When you’re taking the photo, I opted for a short pause in between my burst sessions so as not to overwhelm myself with files, and to give my camera a break from writing so many files.
Pressing the shutter
When you press the shutter button, hold the button down (preferably on a remote release) for the amount of time it takes for the ISS to transit, and then some. My burst sessions were probably around two to four seconds long, which meant 40-80 photos per session. My hope was that I would catch the ISS within one of my burst sessions and not in the short breaks I was taking.
Around the exact time when the ISS was to transit, I may have pressed the shutter for much longer periods, like five or six seconds per burst session, just to give myself the most chances of capturing the moment.
I would not recommend holding the shutter button down “forever” since there will be a point where your memory card cannot handle the writing process and buffering will take place. During this buffering period you won’t be able to take any photos at all, which is not what you want during this critical period.
Additional Tips
- Set your focus manually by zooming in 100% to the sun and focusing on the edge of the sun, or on a sunspot.
- Once focus is achieved, set your autofocus to Manual in the camera or on the lens itself.
- If you’re taking photos, use a remote trigger so that you don’t touch the camera and accidentally move it.
- Double check your solar filter to ensure there’s no holes in it.
- When composing the sun, make sure it will stay in the frame for the duration that you’re shooting.
Step 4: Post Processing
Some editing is necessary to get to the final image, even if you’re shooting in RAW. My workflow is as follows:
- Crop for composition
- Sharpen for details using DxO PureRAW
- Colour for realism using Adobe Lightroom
- Combine for final image using Adobe Photoshop
1. Crop for composition
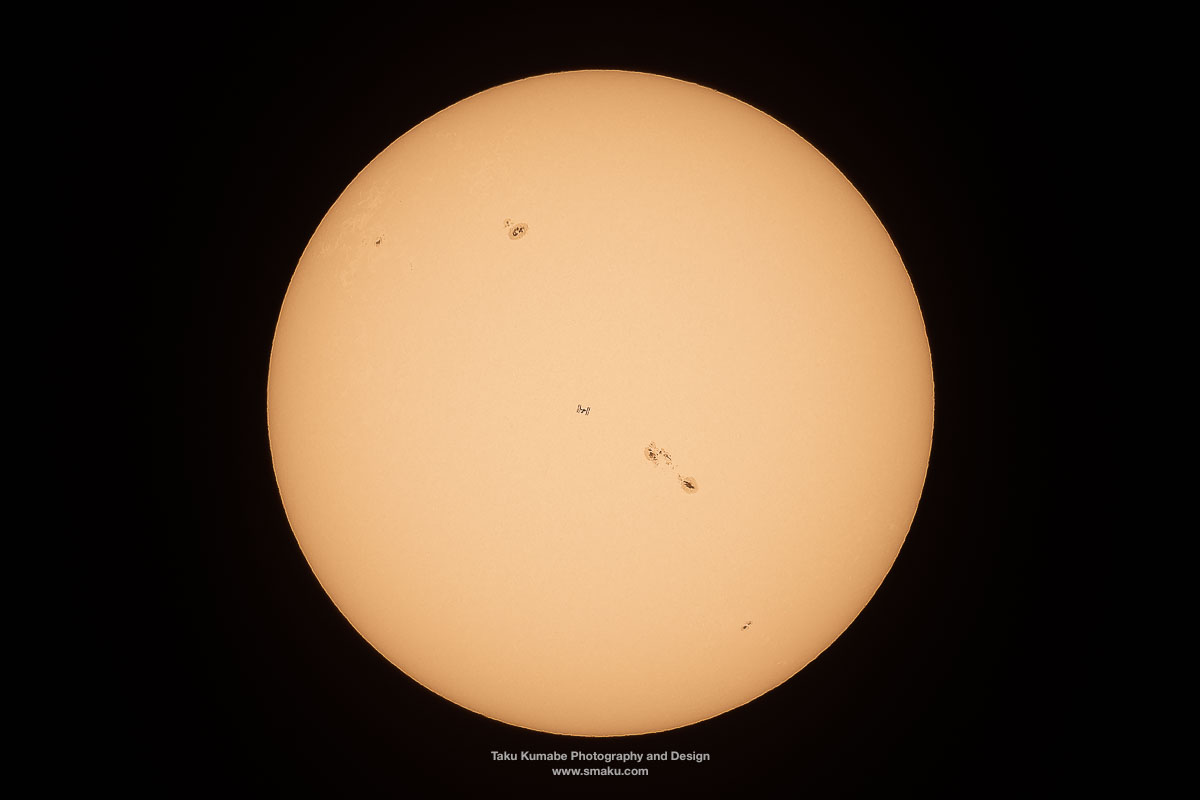
The final edited images are all cropped from their original capture, as you can see from the originals below.
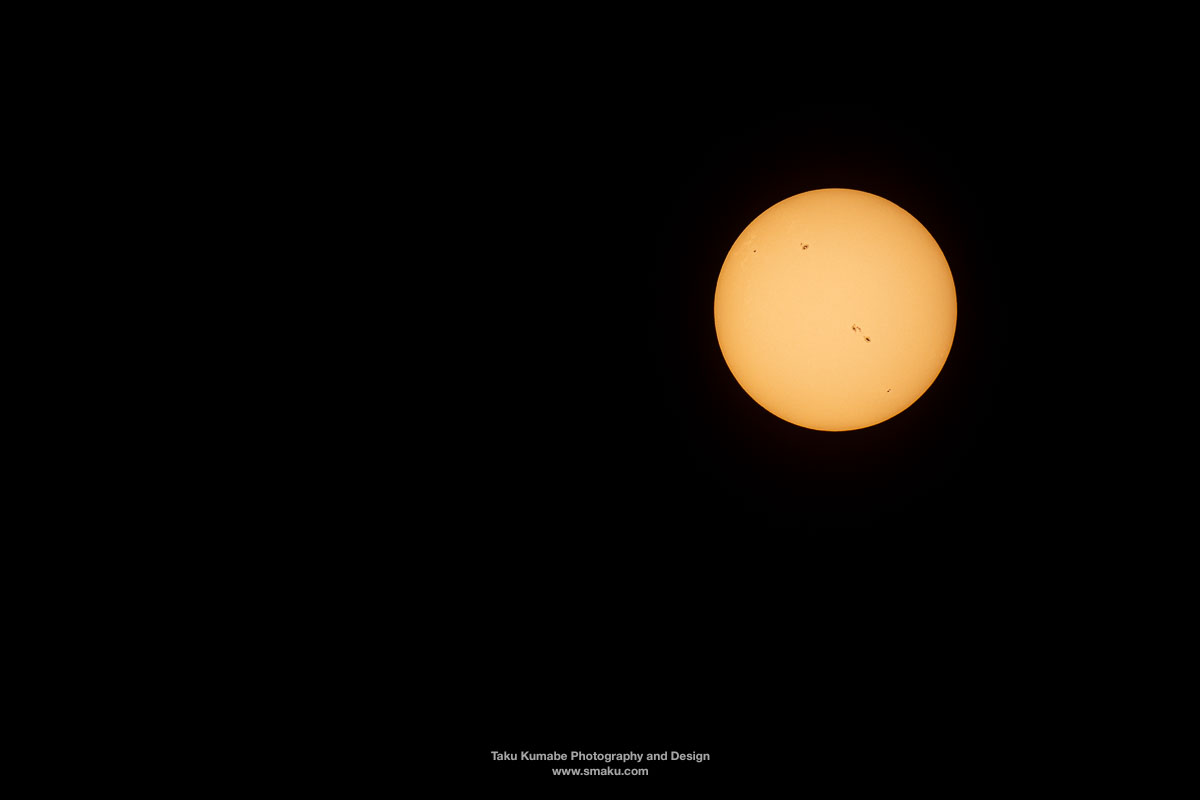
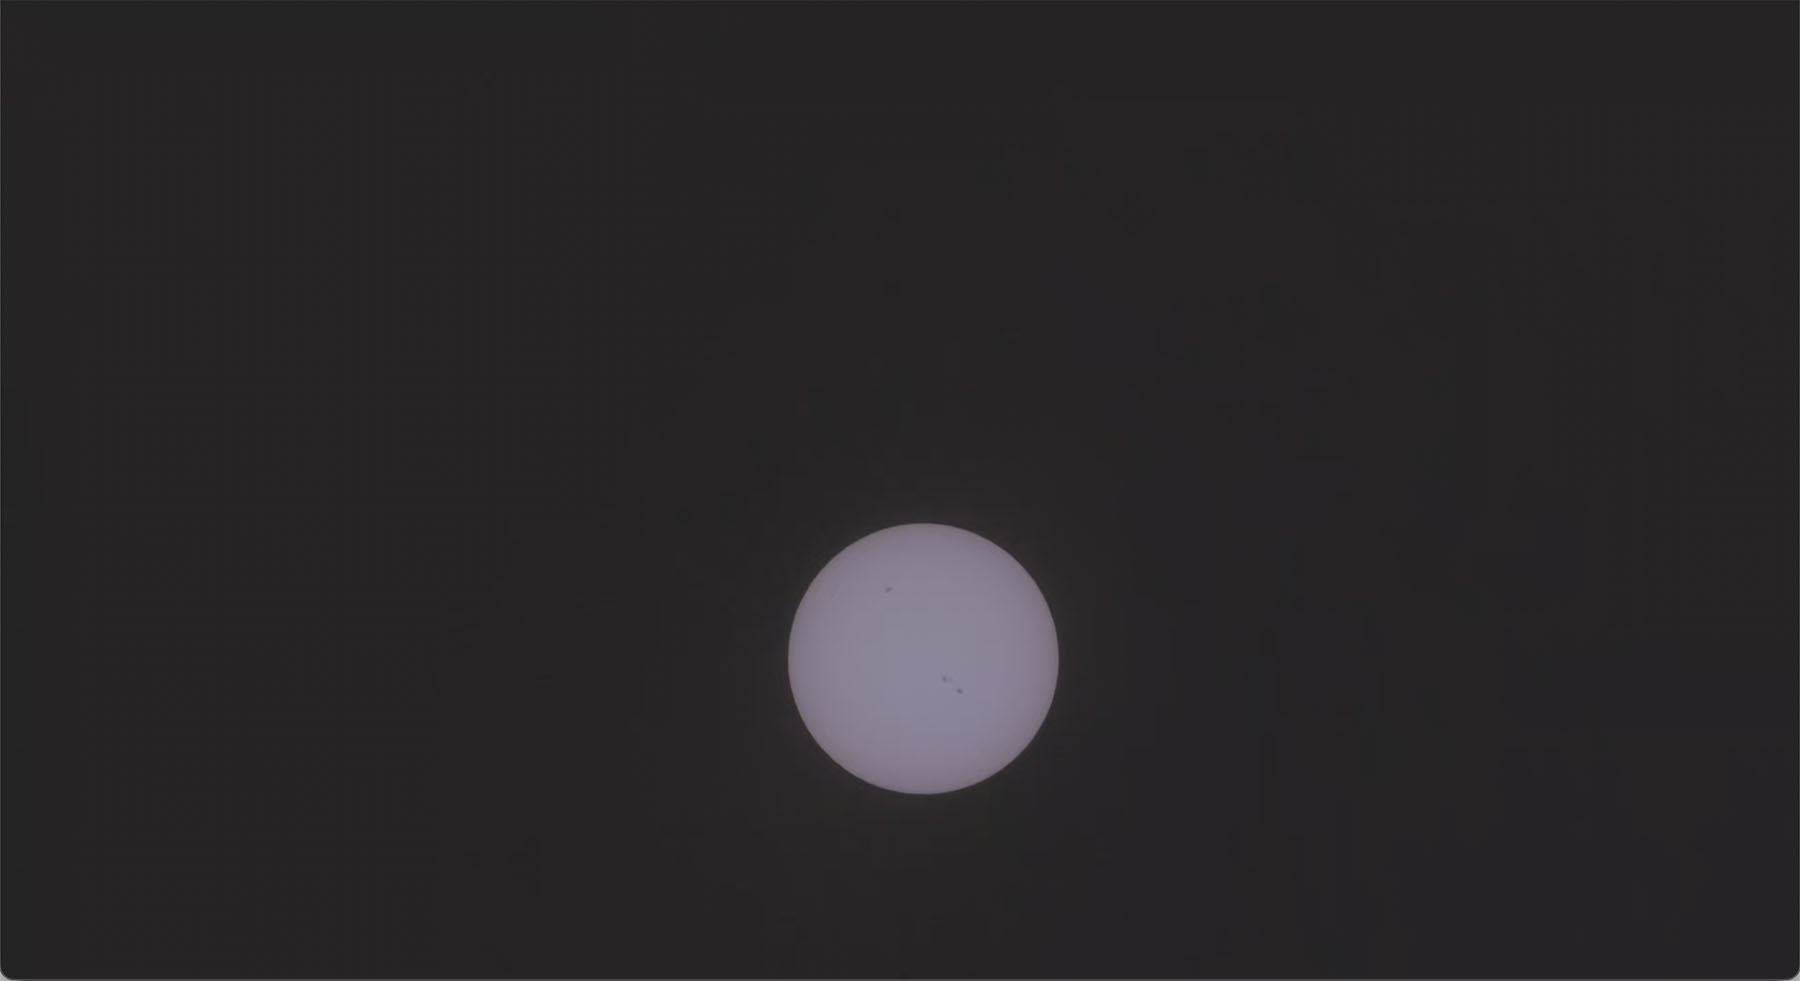
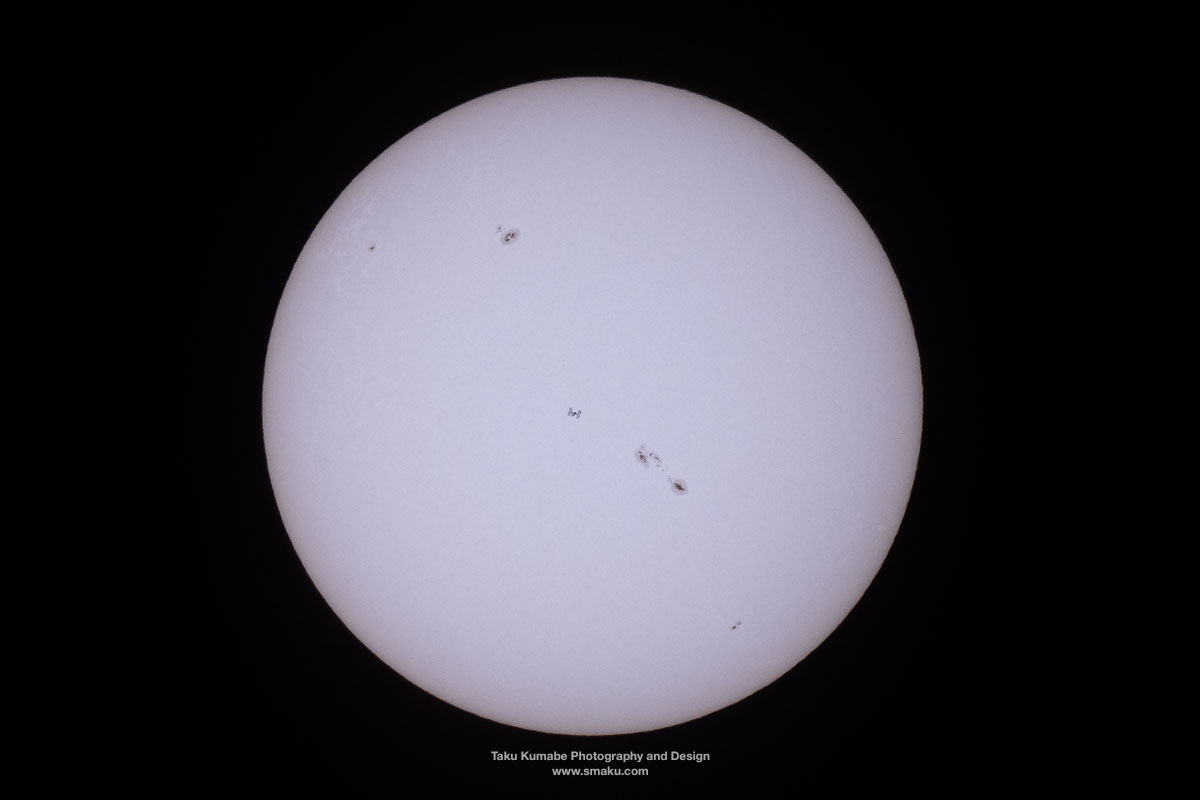
The image (left) has been edited to colour the sun a more orange tone while the video still (right) is from an unedited, N-log footage, hence the grey colour of the sun.
2. Sharpen for details
Straight out of the camera, the details are there but a little soft. You can easily improve your image by sharpening inside Adobe Lightroom.
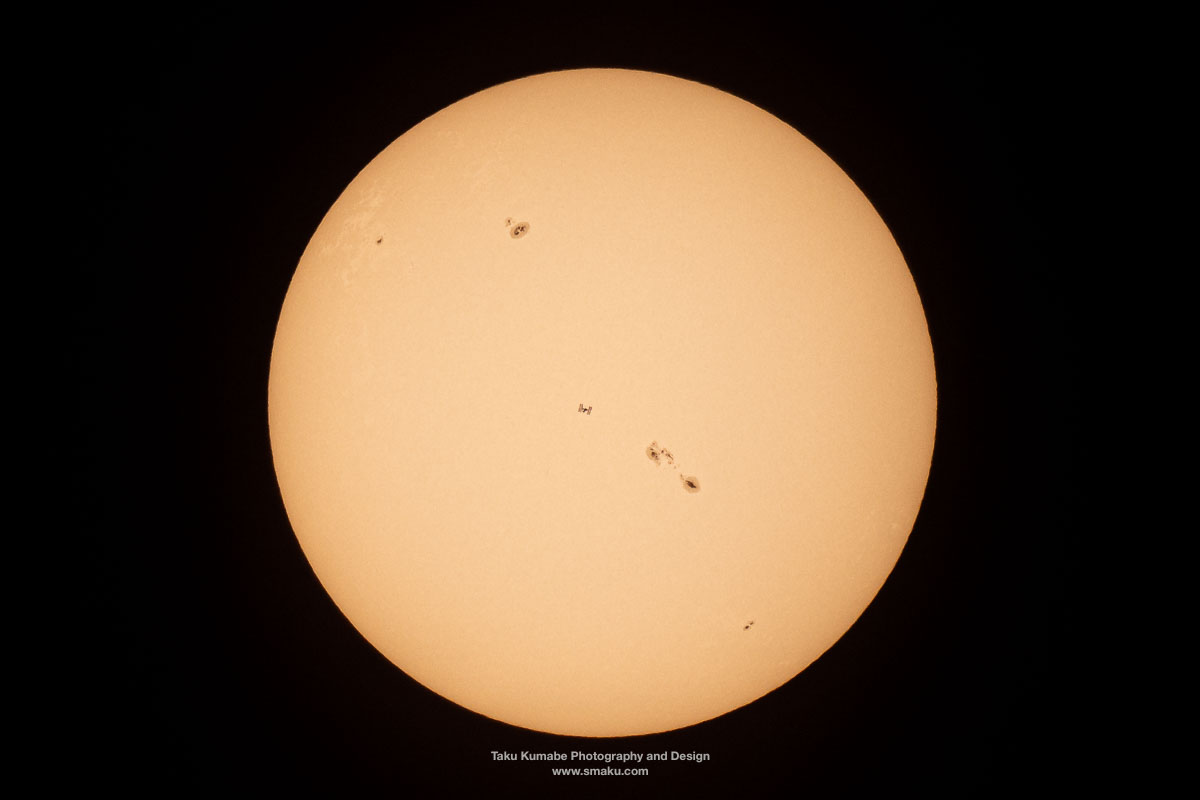
Going further though, I prefer to clean my RAW files by using DxO PureRAW’s superior mosaicing strength which reduces noise and sharpens the image to produce a better looking RAW file. You can read my review on it here! Click the images above to compare against each other.
3. Colouring for realism
Colouring the sun orange is an optional step and one that is not absolutely necessary. We often relate the sun as being orange in the sky, so I colour it to maintain this perception. One look and people will assume we are looking at the sun, whereas if left uncoloured, people might think it’s the moon.
For comparison, here’s the photo that comes out of my camera.
4. Combine for final image
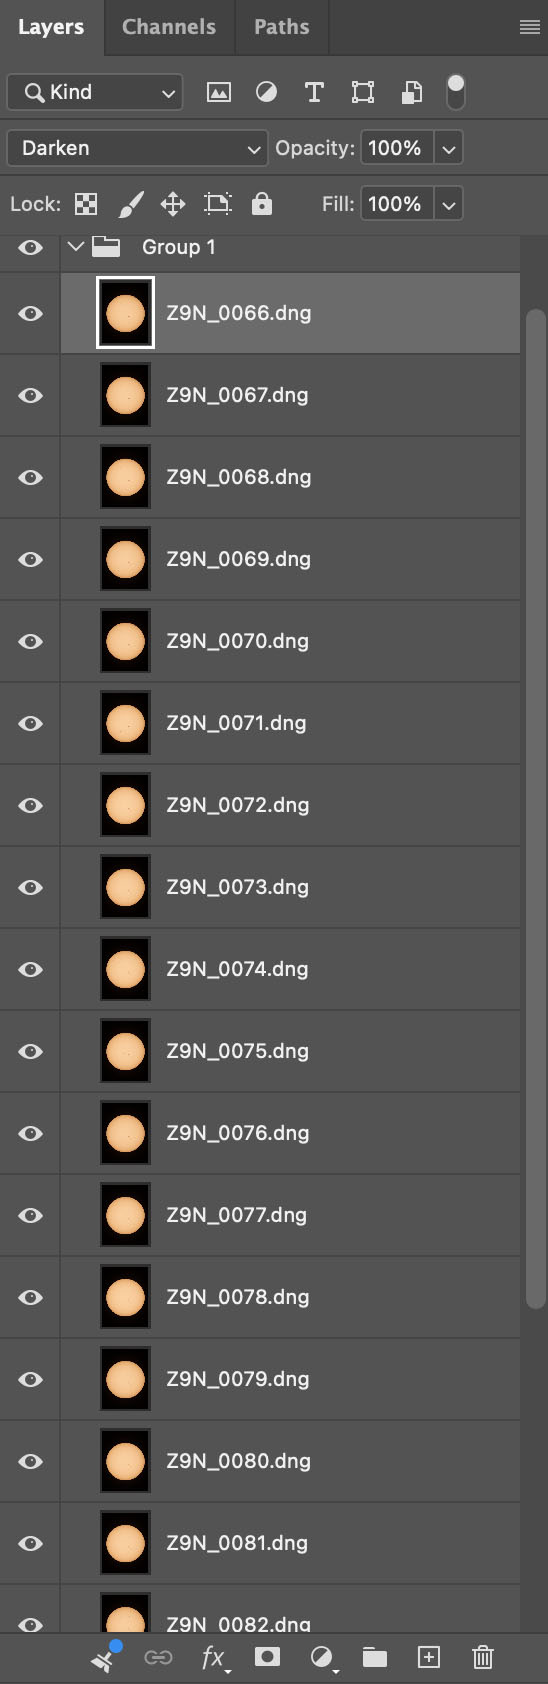
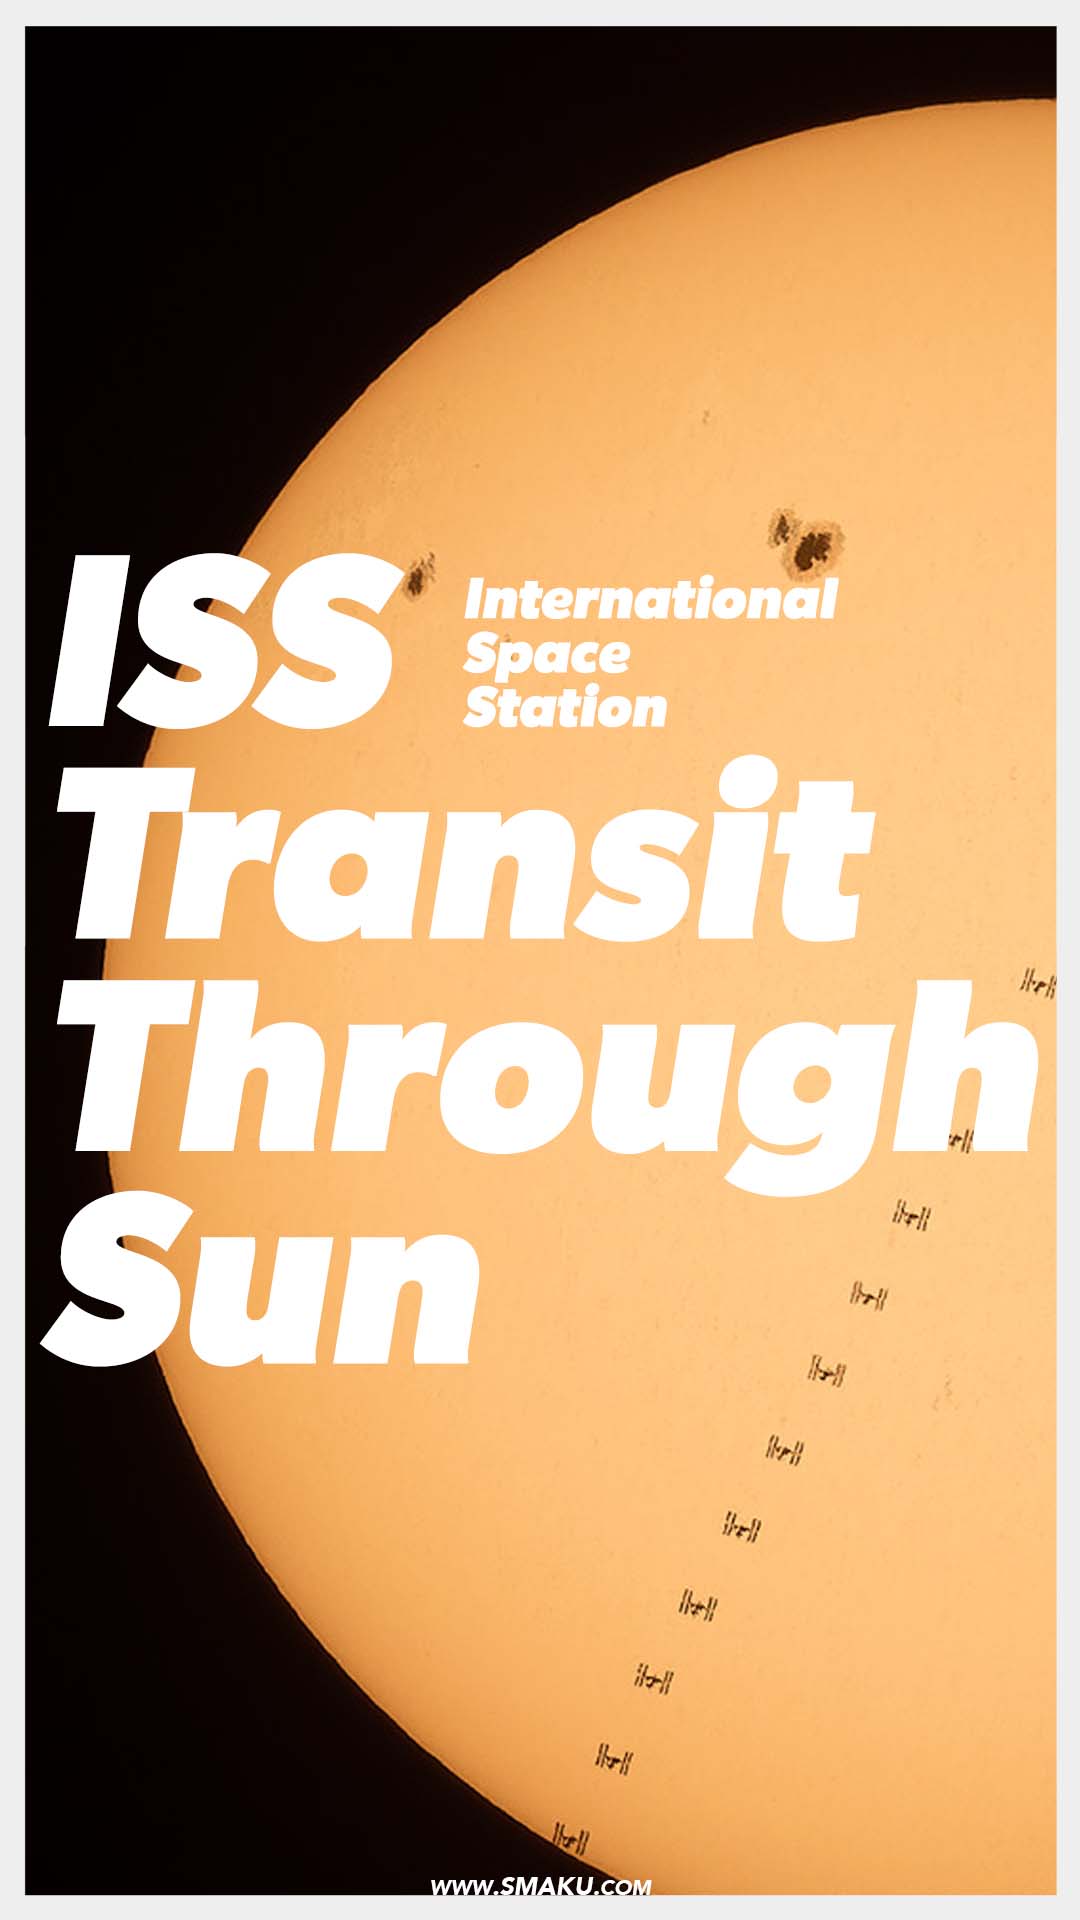
The last step is to take the fully edited image and layer them on top of each other inside Adobe Photoshop. Set the Blend Mode of each layer—except for the very bottom layer—to Darken so you can see the ISS lined along its pathway. Export your image to a JPG and you’re all done!
You can see my Layers palette in Adobe Photoshop to the left. Each layer has a Blend Mode of Darken so any pixel darker on the lower layer (compared to its previous layer) will show up in the image.
Final Thoughts
While photographing the ISS transiting the sun or moon can be challenging and involves a lot of patience, in reality it’s not too difficult if you’ve done your prior research and planning.
There are key points to remember—which I’ve pointed out in this blog post—so I hope these make it easier for yourself to photograph the sun transiting the sun or moon.
Let me know if you have ever photographed the ISS transiting the sun or moon, and how it went for you!